bcmom's kitchen

bcmom's kitchen

Wednesday, December 21, 2011

Spinach and Cilantro Green Rice

Also from the What the Bible Says about Healthy Living Cookbook - I made this rice to go with the burritos last night.


Spinach and Cilantro Green Rice

Ingredients:
  • 2/3 bunch cilantro (stems OK)
  • 1 cup firmly packed fresh spinach
  • 1-1/4 cups milk
  • 1-1/4 cups chicken or vegetable broth
  • Juice of 1/2 lime (about 1 T)
  • 1-1/2 cups brown rice
  • 1/2 tsp salt
  • Several generous grindings pepper
Directions:
  1. Trim the cilantro stems to 1 to 2 inches.
  2. Add the cilantro, spinach, milk, broth and lime juice to a blender and puree the ingredients.
  3. Combine the liquid mixture with the remaining ingredients in a medium saucepan.  Bring the mixture to a boil over medium-high heat.
  4. Reduce the heat to low, cover the pan with a tightly fitting lid, and simmer fo r45 minutes.
  5. After 45 minutes, turn off the heat and let the rice sit for 10 minutes, without removing the cover.  Fluff the rice with a fork before serving.

1/3 bunch of cilantro for the burritos, 2/3 bunch for this rice - you'd think all my cilantro would be used, but those aren't really good measurements, and cilantro bunches vary - so I just used quite a bit of cilantro and called it enough, for both recipes.  I also used frozen spinach because I didn't have any fresh.  I'm not sure how much frozen spinach equals a cup of fresh, so I just threw some in.

I made half this recipe because we just didn't need that much rice.  I usually cook my brown rice 40 minutes so I thought the 45 minutes would be plenty long enough, but there was still liquid in the pan when I took the lid off, and the rice was a bit chewy.  It tasted really good though, so I'm either going to cook it at a higher temperature next time or do like it says and turn the heat off and let it sit - instead of removing it from the heat to let it sit.  The rice should continue to cook on the still-warm burner for a bit longer.

I put some of this on my Sweet Potato and Black Bean Burrito for lunch - along with the salsa, sour cream and guacamole.  Yum!

Sweet Potato and Black Bean Burritos

Jeffrey and I love the African Burritos I usually make, which also include sweet potatoes and black beans.  So, when I was browsing through the copy of What the Bible Says about Healthy Living Cookbook that I got from the library, I just had to try this recipe.

Sweet Potato and Black Bean Burritos

Ingredients:
  • 1 unpeeled large sweet potato (about 1 pound)
  • 1 large onion
  • 2 garlic cloves
  • 1 T olive oil
  • 2 tsp ground cumin
  • 2 tsp ground coriander
  • 1/2 tsp. salt
  • Several generous grindings of pepper
  • 1/3 bunch cilantro (mostly leaves)
  • 2 15-ounce cans black beans
  • Juice from 1/2 lemon or lime (about 2 T)
  • 6 8-inch whole wheat tortillas
Directions:
  1. Preheat oven to 400° and oil a 9x13-inch baking pan.
  2. Cut the potato into chunks and put them into the prepared pan.  Bake fro 30-35 minutes, or until the potato pieces are tender when pierced with a fork.
  3. While the potato bakes:
    • Chop the onion and garlic.  Saute in the olive oil over medium-high heat in a large frying pan.
    • Cook until the onion is soft, about 5 minutes.  Add the cumin, coriander, salt and pepper and cook for 2 to 3 more minutes.  Remove from the heat.
    • Chop the cilantro.  Rinse and drain the black beans.  Add the cilantro, beans and lemon or lime juice to the pan.
  4. When the potato chunks are cooked, remove from the  oven.  Reduce heat to 350°.
  5. Add the cooked potato to the frying pan with the onion mixture. (Set aside the pan you used to bake the potato; you will use it to heat the burritos.)  Using a potato masher, mash the ingredients together to make a thick, chunky mixture.
  6. To assemble the burritos:
    • Lay a tortilla on a flat surface.
    • Spoon 1/2 cup filling mixture over the tortilla.
    • Roll up the tortilla and place in pan, seam side down.
    • Repeat with remaining tortillas and filling.
  7. Cover the pan with foil and bake burritos for 30 minutes, until well heated.
  8. Serve with salsa, guacamole, and sour cream.


The verdict: These are really good.  Jeffrey commented that they are spicier than the other ones, so perhaps cut down on the cumin if you have people who don't like or can't eat spicy foods.  These are very filling - we both ate 1-1/2 burritos, and I wrapped the other three in foil and stuck them in the freezer.  I like the flavor of the roasted sweet potato and will use more sweet potato when I make these again.  Also, I'm not going to bother with the rolling up and baking step.  Instead I'll just mix up and heat the filling and let everybody heat and fill their own tortillas - with the filling along with salsa, sour cream, guacamole, sliced green onions, etc.  I had some leftover filling, and that's how I fixed it for lunch.  It turned out really good.

Friday, December 16, 2011

Crockpot Granola

Granola in the crockpot?  Did you know that was even possible?  The idea never even occurred to me until I saw this recipe for crockpot granola on Pinterest.  And then, I had to try it!  Here's what I did:

Crockpot Granola

Ingredients:
  • 3 cups rolled oats
  • 2 cups wheat flakes
  • 1 T flax seeds, ground
  • 2 T raw sunflower seeds
  • 1/4 cup sliced almonds
  • 1/4 cup chopped pecans
  • 1/4 cup coconut (plus a bit more)
  • 1/4 tsp. cinnamon
  • 1/2 cup melted butter
  • 1/2 cup honey
  • 1/2 cup dried cranberries (can use other dried fruits like raisins or dried apples or a combination)
Directions:
  1. Mix dry ingredients in 5 qt. crockpot.
  2. Add melted butter and honey and mix well.
  3. Cover, but vent with a chopstick. Cook on high for 3-4 hours, stirring every so often - every half hour or whenever you smell the granola cooking.  Cook until granola is browned nicely the way you like it.
  4. Scoop out onto a cookie sheet to cool.  Stirring occasionally while it cools.
  5. Store in air-tight container.
  6. Enjoy!

I have a couple other granola recipes, both are supposed to be baked in the over, but I think I will be trying them in the crockpot.  I think any combination of ingredients you like in your granola will work in the crockpot.  The granola really does cook and brown nicely!  But you don't have to worry about burning it. 

If you like clumps in your granola, you'll need to add more honey or butter or both - or maybe peanut butter like some of the commenters suggested on the other recipe.  I might try the peanut butter next time, but this is very good! 

Another change I'll probably make next time is to either add the dried fruit halfway through the cooking time or even at the end.  The cranberries are still good, but they dried out a bit more than I'd like.

Sunday, December 11, 2011

Butternut Chicken Chili


I took this for a potluck this weekend, and everyone really liked it.

I was going to make my Corn Lover's Veg Stew - which I love - but followed a link to Butternut Chicken Stew on Simple Daily Recipes and decided to make a version of that.  I will be making this again!

 Butternut Chicken Chili

Ingredients: 
  • 2 T olive oil
  • 1 small onion, chopped
  • 2 garlic cloves, chopped
  • 1 lb. boneless, skinless chicken thighs, cubed 
  • 1/2 small butternut squash, peeled & cubed
  • 1 small bell pepper, chopped (can use frozen)
  • 1-1/2 tsp Chili powder
  • 1 tsp cumin
  • 1 tsp salt
  • 1/2 tsp pepper
  • 1 can cooked red beans (or kidney beans)
  • 1 (14.5oz) can tomatoes
  • 1 T tomato paste
  • 2 cups beef broth
  • 2 cups chicken broth
  • 1 cup frozen corn
Directions:
  1. Over medium high heat, saute onion and garlic in olive oil until onion begins to soften.
  2. Add boneless skinless chicken thighs and cook until no longer pink, adding the peppers when chicken is almost cooked.
  3. Lower heat to medium and add seasonings.  Continue cooking, stirring occasionally, while peeling and cubing the butternut squash.  Add squash as you get it cubed and stir to coat with oil and seasonings.
  4. Once all the squash has been added, add beans, tomatoes, tomato paste, and broth.
  5. Bring to a boil, then reduce heat, cover and simmer for about an hour or until squash is soft, stirring occasionally.  Add corn during the last 15 minutes.
  6. Enjoy!

I made cornbread muffins to go with it, and it was amazing!

As with any soup, stew, or chili, feel free to adjust any ingredients to use what you have on hand or to suit your preferences.  Substitute chicken breasts or pre-cooked chicken (maybe from a rotisserie chicken), add more tomatoes or more beans, less broth, all chicken broth - it's up to you!

Thursday, December 8, 2011

Free eCookbook - Salads for Every Season

Earthbound Farm is celebrating 25 years of pre-washed, packaged organic salads by giving away a free ecookbook - Salads for Every Season.

Salads for Every Season: 25 Recipes from Earthbound Farm by Myra Goodman (who’s been called “The Queen of Greens”) is 83 pages of delicious salad recipes from Myra’s first two cookbooks, Food to Live By and The Earthbound Cook.
The cookbook is available in several formats - Kindle, Nook, Google eBooks, etc. - so you can download the one that's right for you.

Enjoy!

Thursday, December 1, 2011

How to Dice an Onion

I was trying to find a good video to go along with my post last night.  A post about getting rid of that onion smell on your hands when you chop onions should have a video on how to chop those onions, right?  However, even though there are plenty of videos on YouTube explaining how to dice an onion, they all seemed a bit over-complicated to me and added unnecessary steps.  So, I made my own video.


Maybe not the best, but it will have to do for now.  I've really got to get an assistant for the camera work!

Let me know if you have any questions.
Enhanced by Zemanta

Wednesday, November 30, 2011

Get Rid of That Onion Smell

I can't cook without onions.  No, really - if I run out of onions I have a very hard time figuring out what to fix for dinner.  There are so many things I just can't won't make without onions!  But cooking with onions means hands that smell like onions, right?


Not necessarily.  There's a really easy way to get rid of that onion smell on your hands - stainless steel!  Simply rub your hands over stainless steel for several seconds while holding them under cold running water, and the smell will be gone.  I usually just use my knife, since I've got it, and it needs rinsed off anyway, but they also have Stainless Steel SOAP which works the same way, without the sharp edges.  I have several oval-shaped ones, but there are different sizes and shapes available, like this Amco Rub Away Bar which is shaped just like a bar of soap.


I'm not really sure how it works, but it does! (One of the product descriptions says: "Negatively-charged stainless steel soap combines with positive charge of cool water to neutralize germs" - so I guess that explains it.)  Onion, garlic, fish - any unwanted odor completely neutralized and eliminated!  Smells really bother me, so I am so happy to know this.  I wish I had known it years ago - back when I was working in the kitchen in college and chopping tons of onions and garlic.  I never could stand to wear the plastic gloves, so I just dealt with the smell, not knowing how easy it would have been to just get rid of it.

So next time you chop onions or get any kind of strong odor on your hands, try stainless steel.  You'll be wanting to keep one of these handy soaps right by your sink for everyday use!

Tuesday, November 22, 2011

Make Your Own Taco Seasoning

I buy my Taco seasoning in the big containers from Sam's Club.  It's definitely cheaper than buying the packets at the grocery store, and there isn't much chance of running out.  Still, it doesn't hurt to have this recipe on hand, just in case

Taco Seasoning
  • 1 T chili powder
  • 1/4 tsp. garlic powder
  • 1/4 tsp. onion powder
  • 1/4 tsp. crushed red pepper flakes
  • 1/4 tsp. oregano
  • 1/2 tsp. paprika
  • 1-1/2 tsp. ground cumin
  • 1 tsp. sea salt
  • 1 tsp. black pepper
  1. In a bowl, combine all ingredients.
  2. To make tacos, use half the batch of seasoning with 1 pound ground beef and 1/4 cup water.

Even though I have plenty of Taco Seasoning, I'll probably have to try this just to see how it turns out.  (and if my taco seasoning has some of the ingredients mentioned in the related article (must read label), I may have to start making it all the time!)
Enhanced by Zemanta

Monday, November 21, 2011

The Everything Potluck Cookbook - Free for Kindle


I love cookbooks, and potlucks, so I definitely grabbed this one.

Right now you can get The Everything Potluck Cookbook FREE for both Kindle and Nook.  It's regularly $15.95, so now is definitely the time to get it!


Product Description:

Potlucks are a great way to get friends and relatives together without the pricey grocery or restaurant bill! In this cookbook, veteran cook Linda Larsen gives you an array of options for every meal and course. In addition, easy-to-understand icons indicate whether a recipe is easy, healthy, quick, or inexpensive. Everything you need to host, or attend, a successful potluck is here, including: 300 tasty and creative recipes; Tips for transporting food safely; Indications of whether a recipe can be made ahead of time; Menu suggestions for a variety of potluck parties. Guests can make the dishes on their own and bring them to the host's home, or they can all gather in the host's kitchen and make them together. With this book, cooking for the perfect potluck party has never been easier!

Don't have a Kindle? Use the Free Kindle Reading Apps for PC, MAC, iPhone, or Android, or treat yourself to a beautiful new Kindle Fire! OK, I don't really need one, but I would love to have one!  Wouldn't you?

Friday, November 18, 2011

Free Martha Stewart Thanksgiving Cookbook

Make this year’s Thanksgiving feast your most memorable ever with help from Martha Stewart and an esteemed group of our nation’s top chefs, including Emeril Lagasse, Sara Moulton and Eric Ripert. 

Download your FREE copy of the cookbook from Martha Stewart Living Radio on Sirius XM Satellite radio.  You can get the entire cookbook or download each chapter individually.

There are some really yummy-looking recipes in here!  The Sweet Potato Turkey Chowder and the Butternut Squash Lasagna are two that caught my eye.

Tuesday, November 15, 2011

Chard and Cheddar Omelet

I found this recipe over at Recipezaar, made these omelets once, and then forgot all about it until I was sending chard recipes to a friend last week.


Chard and Cheddar Omelet

Ingredients:
  • 2   tablespoons   butter
  • 2 garlic cloves, minced
  • 4 ounces swiss chard, stemmed and chopped (equals about 3 cups of packed chard)
  • 3/4 teaspoon hot pepper sauce
  • 5 large eggs
  • 3/4 cup grated sharp cheddar cheese
  • 1/4 teaspoon salt
  • 1/4 teaspoon ground black pepper
Directions:
  1.  Melt 1 tbsp of butter in an 10-inch diameter non-stick skillet over medium-low heat. Add the garlic and saute until soft (about 2 minutes). Stir in the swiss chard, cover, and cook until tender (about 4 minutes). Stir in the hot sauce. Season with salt and pepper. Transfer to a small bowl, and wipe the skillet clean.
  2. Whisk the eggs, 1/4 cup cheese, salt, and pepper in a medium bowl to blend.
  3.  Melt 1/2 tbsp butter in the skillet over medium-high heat. Add half of the egg mixture and cook until the eggs are just set in the centre (about 2 minutes), tilting the pan and lifting the edge of the omellete with a spatula to let the uncooked portion flow underneath. Scatter half of the chard mixture over half of the omelette. Sprinkle 1/4 cup of cheese over the chard. Fold the omelette over the cheese, and slide onto a plate.
  4. Repeat with the remaining butter, egg mixture, chard, and cheese.

  Made them for dinner the other night - so good!

Tip: When making omelets for dinner (or any time), turn your oven on warm and place the finished omelets in the oven while you cook the rest.  That way everyone can eat at the same time, and the cheese gets all melty, more than it does just from cooking in the skillet.  Of course, you want to make sure your plates are oven-proof!  I usually cook all our omelets, and then while they're staying warm in the oven, I make toast to serve with them.  When the toast is done, the omelets are perfect, and we can all sit down together.
Enhanced by Zemanta

Hearty Soup

This soup is so good!

Hearty Soup

Ingredients
  • 1 lb. lean hamburger or ground turkey
  • 12 oz. diced potatoes
  • 1/2 c. each carrots, celery & onions, chopped
  • 4 oz. rice
  • 4 tsp. butter or margarine
  • 1-28 oz. can tomatoes, quartered, w/ juice
  • 1/2 large head cabbage, cut into wedges
  • 1-1/2 quarts water
  • 2 tsp. salt
  • 1/2 tsp. pepper
Directions
  1. In margarine, sauté cooked hamburger, carrots, celery, onion and rice until vegetables are tender.
  2. Add remaining ingredients.
  3. Simmer 3 to 4 hours

Serve with biscuits - made with half whole wheat flour.  

For best results, make this soup they day before you want to serve it. Refrigerate it overnight and reheat the next day - it's better that way and continues to improve every time you reheat it!

Measurement tip: 1 lb. diced potatoes = about 4 cups.  So for the 12 oz. needed in this recipe, you will need 3 cups.

Thursday, November 10, 2011

Biscuits

I've been making these biscuits for as long as I can remember. They're really easy and good!

Biscuits
  • 2 cups flour
  • 1 T baking powder
  • 1 tsp. salt
  • 1/3 cup vegetable oil
  • 2/3 cup milk 
  1. Mix dry ingredients together in medium bowl, using fork
  2. Pour oil and milk into measuring cup (do not stir together), then pour all at once into flour mixture
  3. Stir with fork until mixture cleans sides of bowl and rounds up into a ball.
  4. Knead on floured surface just until dough looks smooth; roll dough out to 1/2" thick; cut with biscuit cutter and place on ungreased baking sheet
  5. Bake at 475° for 10-12 minutes or until golden brown

Depending on what I want to use these for, I either use all white flour or half whole wheat.  The whole wheat ones go especially well with Hearty Soup.

Either way they're really good. I especially love the little odd-shaped ones because they get really crispy!

Sunday, November 6, 2011

Apples and Apple Dip

Apples are an all-American success story-each ...Image via WikipediaI love apples.  They make great snacks.  They're good with popcorn, good with peanut butter, really good with this apple dip recipe I tried recently.  They're also good in pies, crisps, cakes, and muffins.

The problem I have is remembering which apples are good for what - which ones are for eating, which ones for baking and cooking.  So, when I found a list in the food section of my newspaper describing apple varieties and what they're good for, I saved it.

These are some of Wisconsin's favorite apples:
  • Gala apples are small to medium in size with a yellow-pinkish skin.  Sweet and juicy, they are good for salads and cooking.
  • Paula Red apples are medium-sized and are red over green skin.  Juicy and sweet, they are great for both cooking and eating.
  • Fuji apples are large, with a reddish-pink skin.  They are sweet and best for eating and salads.
  • McIntosh apples are small to medium in size with a bright red skin.  Mild, they are good for cooking, eating, and sauces.
  • Honeycrisp apples are larger, with a red and green skin.  They are juicy, sweet and crisp.  Great for eating.
  • Golden Supreme apples are medium-sized and sweet.  They are good for eating, salads and sauces.
  • Ginger Gold apples are medium to large with a yellow skin.  Juicy and sweet, they are good for eating and baking.

I'm not sure if that helps or not.  I'll probably still buy my apples the way I usually do - by smelling them and buying the ones that smell the best.  I do know that I like tart apples like Granny Smith with that Apple Dip!  What?  You want the Apple Dip recipe?  All right, here you go.  I went looking for an apple dip recipe online - there are lots - and combined a couple that sounded good.

Apple Dip
  • 1 (8 oz.) pkg. cream cheese, softened
  • 1/2 c. crunchy peanut butter
  • 3/4 c. brown sugar
  • 1 tsp. vanilla
Mix all ingredients together, then stir in some Heath bits o brickle (baking bits). I didn't measure them, just poured some in.

Serve with sliced apples. Tart apples are best.

This stuff was really popular!  It can be made without them, but the toffee bits really add something.  Somebody asked if it was peanut brittle in there, so next time I make this I am trying peanut brittle.  It sounds like it will be good.
Enhanced by Zemanta

Thursday, November 3, 2011

Crazy for Coconut - Rum, That Is!

I pulled these recipes off a bottle of coconut rum we had.  When I went looking for the website, I found it wasn't there anymore.  Are they not making Cabana Boy rum anymore?  The information on the back of the recipes said it was produced and bottled by White Rock Distilleries, but when I visited their page, I didn't find it either.  They do have a line of flavored rums called Jack, so I checked that out.  There are several recipes for the coconut rum, but neither one of these are there.  So I'm sharing before I lose this cute little umbrella-drink-shaped tag with the recipes.

This one sounds particularly good.  Have I mentioned that anything cranberry catches my attention?
 

Jamaican Me Crazy
  • 2 oz. Coconut Rum
  • 1 oz. cranberry juice
  • 1 oz. pineapple juice
  • 1 oz. orange juice
  • 1 oz. sour mix

Mix with ice and garnish with fruit.

This one sounds like a really good milkshake:

Coconut Mudslide
  • 2 oz. Coconut Rum
  • 2 oz. coffee liqueur
  • 2 oz. Irish cream
  • 1 oz. chocolate syrup
  • 2 cups vanilla ice cream
Blend first four ingredients.  Mix in ice cream.

Here are the coconut rum recipes on the Jack Flavored Rums website. Some of these sound pretty good, too.

Mediterranean Penne Pasta and Beans

I don't know what it is about this stuff, but I love it! I could eat it all week, and usually I do - because usually I make it just for me. (my husband tends to turn his nose up at things that don't include meat)  The flavors and textures just seem to go together so well.  And really, with the beans and pasta and greens, and feta!, who really needs meat?

Mediterranean Penne Pasta and Beans

Ingredients
  • 6 oz. (1 3/4 cups) uncooked penne (tube-shaped pasta)
  • 1 T olive oil
  • 2 garlic cloves, minced
  • 2 (14.5-oz.) cans diced tomatoes, undrained
  • 1 (15-oz.) can kidney beans, drained and rinsed
  • 1-1/2 t. dried Italian seasoning
  • 1 t sugar
  • 6-8 cups fresh chard, stems removed and chopped (or a 10-oz. pkg. prewashed fresh spinach)
  • 2 oz. (1/2 cup) crumbled feta cheese
  • 1/4 cup sliced ripe olives
Directions
  1. Cook penne to desired doneness as directed on package. Drain; cover to keep warm. 
  2. While pasta is cooking, heat oil in large skillet over medium-high heat until hot. Add garlic; cook and stir 30 seconds.  Add chard; cook until chard wilts, stirring frequently.
  3. Add tomatoes, beans, Italian seasoning and sugar; mix well. Bring to a boil. Reduce heat; simmer 10 minutes. 
  4. To serve, arrange cooked penne on large serving platter. Top with tomato mixture. Sprinkle with cheese and olives.

The original recipe calls for garbanzo beans and spinach, but I've always used the kidney beans and chard, mostly because I like kidney beans better, and I always have plenty of chard from my garden.

Also, this is why I need to start saving all my recipes in the same place.  I want to make this for lunch, knew I had the recipe printed out somewhere - but I couldn't find it anywhere.  So I went looking online and thankfully found it!

Tuesday, November 1, 2011

I'm a Recipe Nut

RecipesImage by pirate johnny via FlickrI collect recipes, from everywhere.  I cut them out of the Sunday paper, out of magazines, out of the coupon section of the paper.  I have some of them organized in one of those 'magnetic' photo albums, and I use a lot of those recipes over and over.  I have a whole bunch more in a shoe box and some organized in envelopes - according to recipe type - and more in a large envelope, and...  Well, I have recipes all over the place and, even though I cut them out originally because I really wanted to try them, I usually never do get to try them - because I can't find them again!  Or, even worse, I try a recipe that we really like but then I can't find it again!

And that's just the printed recipes.  There are so many recipe sources online.  Sites where you can find recipes for just about anything and even save those recipes for later use.  The problem is that there are so many sites - and I've signed up for and saved recipes at most of them.  But finding those recipes later?  Not so easy, because who can remember where a particular recipe came from?  That's why I'm loving RecipeNut.  It's a site for gathering, collecting, and sharing recipes from anywhere.  Adding a recipe from another site is as simple as pasting in the URL.  RecipeNut finds the recipe info, you add some tags, select some categories to make the recipe easier to find on the site, and save it.

I've been saving all the online recipes I want to try at RecipeNut for a while.  So now I always know where to look!  Now I just need to get around to all the recipe sites and save the recipes I liked over there to RecipeNut so I can find those too.  And all those printed recipes?  I'm either going to have to start finding them (or something similar) online so I can save them to RecipeNut, or I'm going to have to add them myself.  You can add your own recipes, too by manually entering measurements, ingredients, and instructions.  Personal recipes can either be shared with everyone else who visits RecipeNut, or you can keep them private.  So, if you want to save your grandma's secret chocolate cake recipe, you can keep that to yourself.

Besides being a great place to save recipes, RecipeNut is a great place to find them too.  All the recipes there are recipes that people thought were worth saving and sharing.  I usually end up saving one or two from the front page where they always show the most recently saved recipes.  It's easy to save them, just click 'Save' and it's added to your recipe box.  You can also browse through the categories such as Main Ingredient, Meal/Course, or Occasion to find recipes.  I haven't done that a lot because I'm still saving all these other recipes - I'm afraid I'd never stop!
 

Enhanced by Zemanta

Cheap Healthy Meals for a Working Lifestyle

Some people will lead you to believe that eating the right foods will cost you an arm and a leg. Others may think that the right foods are bland and tasteless. Would you believe that you can make cheap healthy meals in the comfort of your own home? That’s right! Using ingredients from your local grocer, you can make a huge difference whether it is your goal to lose weight, reverse a medical condition, or simply start living a healthier lifestyle.

1. Start with preparation methods

You can do this by writing down some of your favorite meals and looking into how they are prepared. If your favorite dishes are prepared by another person, include these as well. Many of us love foods that are cooked in oil. Though lard is relatively inexpensive, it is the most fattening of the cooking oils available on the market. Some restaurants use lard in the preparation of their meals, but you can go online and look up ways to cook the same foods using canola oil. Though some grocers price canola oil slightly higher than corn or vegetable oil, your best bet would be to buy the largest size possible at a grocery warehouse or discount store. You can also look into ways to reduce the amount of oil used. Dishes like fried chicken can be prepared using less than half the amount of oil that would be used if It were cooked in a deep fryer. Also, look into using oil sprays to make things like french fries and sautéing vegetables.

2. Take a look at the ingredients

Some of us work long hours and want to have the quickest meal possible. There is nothing wrong with wanting a quick meal, but taking shortcuts can result in taking in extra calories -- fat and sodium. This is especially the case with processed meats and meal starters. If you like to make beef stroganoff, try using a low-sodium or reduced fat cream of mushroom soup along with a teaspoon of your favorite seasonings. If your dish needs more flavor, then add more of the abovementioned ngredients carefully. Dried and fresh herbs are a great alternative for those who are trying to cut back on sodium. Also, roasted garlic cloves can be made easily in your own oven. After spraying the cloves with oil, place them in the oven at 400 degrees for about 20 minutes. If garlic cloves cook uncovered without oil, they will most likely scorch and have a bitter aftertaste, which will make them inedible. Garlic cloves are also good for lowering high blood pressure.

3. Portion Control

Many of us take pride in eating a large meal and when done in moderation, there is nothing wrong with this. However, constant consumption of large servings can expand the stomach, which lead to more an increase in daily calories. Ways to watch our portions is to chew food slowly before taking another bite and to fill up on vegetables instead of breads and other starches. Weight Watchers suggests placing your eating utensil down on the table between bites. This is a natural way to tell your brain that you arefull and will not need more food. Practicing this on a daily basis will lead to less food intake per meal, which will give you more leftovers for later!
 

Saturday, October 1, 2011

Pasta Salad


I got this recipe from my mother-in-law several years ago. Like she said - it's really good! Especially for a cool summer meal.

(Yes, I know that it's already Fall, but I've been putting off the posting of this recipe - just bookmark it and save it for next summer.)

Pasta Salad

Ingredients:
  • 5-6 cups cooked pasta
  • 2 medium carrots, sliced or shredded
  • 2 small zucchini, thinly sliced
  • 4 green onions
  • 1/2 white onion, sliced in quarters
  • 1 tomato, cubed
  • 2 bunches broccoli cut up small (2 cups)
  • 1/2 can sliced olives
  • 1/2 green pepper, diced
  • 1/2 cup Parmesan cheese
  • 2/3 cup salad dressing (Italian)
Directions:
Mix all ingredients, chill, and serve.


While it's best with fresh vegetables, I have used canned tomatoes and frozen broccoli in this, and it turns out just fine.  I always use Italian salad dressing, but it could be made with whatever kind you like, perhaps Ranch - whatever you like.  It makes a lot, so I usually have to store it in a 4-quart or 5-quart ice cream bucket because I don't have any other containers big enough.  Love those ice cream buckets for everything!
 

Friday, September 16, 2011

Baked Jalapeno Poppers

Baked Jalapeno PoppersImage by fritish via FlickrSince I have all these hot peppers, I went searching for a recipe for jalapeno poppers and found this post about baked jalapeno poppers - which linked to this recipe - Baked Jalapeno Poppers. Perfect!  I didn't want anything deep fried - mostly because it makes a mess, but also because too much grease makes me feel sick.

Baked Jalapeno Poppers

Ingredients
  • 12 fresh jalapeno peppers, halved lengthwise, stems, seeds and membranes removed
  • 6 ounces cream cheese, softened
  • 1 1/2 cups grated Monterey Jack or mozzarella cheese
  • 1/2 teaspoon ground cumin
  • 1/2 teaspoon cayenne, or less, to taste
  • 2 large eggs
  • 2 tablespoons milk
  • 6 teaspoons Essence, recipe follows
  • 1 cup breadcrumbs
  • 1/2 cup all-purpose flour
Directions
  1. In a bowl, cream together the cream cheese, Monterey Jack cheese, cumin, and cayenne.
  2. In a small bowl, beat together the eggs, milk, and 2 teaspoons of the Essence. In a shallow dish, combine the bread crumbs with 2 teaspoons of Essence. In a third dish, combine the flour and 2 teaspoons of Essence. 
  3. Spread cheese mixture into the middle of each jalapeno half. One at a time, dredge in the flour, dip into the egg mixture, then dredge in the bread crumbs, pressing to coat. If necessary, repeat the process. Place the coated peppers, cut side up, on lightly greased a baking sheet and bake at 350° F until the filling is runny and the crust is golden, about 30 minutes.
  4. Remove from the oven and serve immediately with cold beer.  (or milk)
*Essence (Emeril's Creole Seasoning):
  • 2 1/2 tablespoons paprika
  • 2 tablespoons salt
  • 2 tablespoons garlic powder
  • 1 tablespoon black pepper
  • 1 tablespoon onion powder
  • 1 tablespoon cayenne pepper
  • 1 tablespoon dried leaf oregano
  • 1 tablespoon dried thyme

Combine all ingredients thoroughly and store in an airtight jar or container.

Yield: about 2/3 cup

I didn't follow the original recipe exactly - partly because I wrote it down wrong and partly because it called for 1 T of the cream cheese filling in each jalapeno half, but that seemed like too much - so I just gave up any pretense of measuring after the first half and simply filled them.  I stopped counting how many peppers I used, but it was definitely more than 12.  I had to add more bread crumbs because I ran out before I ran out of cream cheese mixture or anything else.  About the time I finished dredging all the peppers in flour, egg mixture, and bread crumbs, I decided to try egg mixture, flour, egg mixture again, bread crumbs - and that seemed to work better.  Just remember the cardinal rule - wet with one hand, dry with the other - or you'll end up with a huge mess.  It's messy enough as it is.

I did not bake all of these - just a few because I just had to try them.  I put them all on a wax paper-covered cookie sheet and placed them in the freezer.  Once they're frozen, I will place them in a sealed container, probably with wax paper between layers - all ready to take out and bake whenever I get the urge.

The few that I did bake and try?  Amazing!  Seriously.  These are so good.  Yes, they take quite a bit of time to prepare, but I'm thinking they're worth it.

Enhanced by Zemanta

Thursday, September 15, 2011

Mojito!

There's a recipe for a frozen Mojito in my Ninja cookbook.  I grew mint this summer just so I could make Mojitos, but I hadn't thought to make them in the Ninja.  I've been making them like this - without all the fancy stuff: (and I just remembered I should have bought club soda when I went shopping yesterday)


Anyway tonight I tried the Ninja recipe - only I mixed it up and then put it into the freezer to get/stay all slushy, like the Cranberry Daiquiri Slush I've been making this summer.


Frozen Mojito 

Ingredients 
  • 2 Limes, Juiced 
  • 10-12 Mint Leaves 
  • 2 OZ. Simple Syrup* 
  • 6 OZ. White Rum 
  • 2 Cups Ice cubes 
Instructions 
  1. Add all ingredients into the pitcher and use long pulses until well blended. 
  2. Serve in 2 tall rocks glasses, garnish with mint. 
*Combine 4 Tbsp Sugar and 4 Tbsp Water in saucepan on warm stove until sugar dissolves.

I'm not sure how I'm going to serve it up - probably need that club soda to mix with the slush...

I did taste it, once it had frozen and I scraped it from the glass dish I had it in originally and put it into a plastic container with a lid - less worry that it will get knocked out of the freezer and shatter on the tile floor making a huge mess and not allowing me to enjoy my mojito!  It tasted quite good.  I think I'm going to enjoy this quite a bit!
 
Enhanced by Zemanta

Lots of Hots

I got lots of hot peppers from my garden this year. I've mostly just been letting them grow and ripen on the plants and picking as I wanted some for salsa or something, but they were calling for a possible frost last night, so I went out and picked a bunch yesterday.   And now I have to figure out what I want to do with them.  I found a couple options at Gardeners.com:

To Freeze Peppers: Halve sweet peppers (green, red, yellow or purple), remove the core and seeds, and slice into julienne strips or small 1/4" chunks. Pack them into a freezer bag, squeeze out the air and throw them in the freezer. That's it! Frozen peppers are best used in a dish that gets sauteed, such as a stir-fry, or added to onions and potatoes for a tasty omelet.

To Pickle Peppers: Prepare peppers as above. Fill a clean pint or quart jar to within an inch of the top with the chopped peppers. Pour in white vinegar to cover all peppers. Cover with a plastic lid if possible, as the vinegar will gradually corrode metal lids. Store the jar in the back of your refrigerator for up to 12 months. The peppers will stay crunchy for a few months but will gradually soften. Spoon them out of the jar as you need them. The vinegar is flavorful, too. My favorite pickled peppers are a colorful mix of yellow, orange and red Hungarian hot wax peppers. They're great on sandwiches or mixed into pasta and bean salads.

and another option at My Daily Bread Body and Soul:
 
Hot Pepper Sauce 

Ingredients
  • Hot peppers, any variety and amount* 
  • White Vinegar 
  • a few peppercorns (optional) 
  • Garlic (optional) 
Directions 
  1. Clean the jars you are going to be using in the dishwasher or boiling water. 
  2. Bring vinegar to a boil. 
  3. Wash peppers and either chop then to fit in your jar or put a little slit in them so that the vinegar penetrates them, which is what I did. 
  4. Add peppers, garlic and peppercorns to a decorative bottle or jar. Pour boiling vinegar over peppers. Make sure peppers are completely covered with vinegar. Leave a little head-space, airspace in between the peppers and vinegar and the lid, and close the lid. Let it sit for a few weeks and enjoy. 
I always store them in the pantry, if it make you feel better, store in the fridge. *Amount of peppers used depends on how hot you want your sauce and what type peppers you have on hand and how big of a bottle you are going to use. Cayenne peppers are HOT and just after a couple days my sauce was hot and ready to be used.

And, of course, I could dry some of them. I did that once when I grew habaneros - just strung them with a needle and thread and hung them in the kitchen.  I had a lot of sweet peppers last summer, and I froze a bunch of those.  I chopped them into the 1/4" chunks, spread them on cookie sheets and froze them.  Once they were frozen, I put them into zipper bags.  That works really well and makes it easy to grab just the amount of peppers I need for a recipe - so some hot peppers like that will be nice to have.

Enhanced by Zemanta

Wednesday, September 7, 2011

Raspberry Cobbler

I didn't put all the raspberries I picked yesterday into the freezer. I decided to use some of them and make this Raspberry Cobbler. I mostly followed the original recipe.

Raspberry Cobbler

Ingredients:
  • 1 c. flour 
  • 1-1/2 tsp. baking powder 
  • 1/2 tsp. salt 
  • 1/2 c. sugar 
  • 1/2 cup butter, melted 
  • 1/2 c. milk 
  • 1/2 tsp. vanilla 
  • 3 c. fresh (or frozen) unsweetened raspberries 
  • 1/3 c. sugar 
  • 1 tbsp. flour
Directions:
  1. Butter or spray an 8 inch square baking pan. 
  2. Combine flour, baking powder, salt and sugar in medium bowl. Make well in center. Add melted butter, milk and vanilla. Stir until blended. Pour into prepared pan. 
  3. In another bowl, combine raspberries, sugar and 1 tbsp. flour. Spoon fruit mixture evenly over batter. 
  4. Bake at 350° for 45 to 55 minutes or until golden brown and done in the middle. 
  5. Serve warm with vanilla ice cream.

Pearl tapioca, before soaking. This is high qu...Image via WikipediaThe original recipe called for 2/3 cup sugar and 1 T tapioca to be mixed with the raspberries.  I cut the sugar in half because I don't like things all that sweet, and I substituted flour for the tapioca because the only tapioca I have is the Pearl kind that's supposed to be soaked - and I didn't want to wait for it since everything else was already mixed up.  The flour was fine, but now I'm thinking I need to make some tapioca pudding!  After we finish the cobbler, of course, which turned out really good - at least I thought so!

Also - Cobbler.  When I was looking up recipes I found some like this with the batter on the bottom and fruit on top and others with the fruit on the bottom and a biscuit-type crust on top.  So, which is it?  What is a cobbler really?
 
Enhanced by Zemanta

Tuesday, August 23, 2011

Vegetable Oven Pancake

I posted a recipe a while back for a Puffed Oven Pancake we really liked.  I served it with fried apples and thought of it as breakfast or dessert or 'breakfast for dinner'.  It never occurred to me to try vegetables or that it could be a main dish - until I saw this recipe, and then I just had to try it.  We had this for dinner one night last week.

Vegetable Oven Pancake

Ingredients:
  • 2 T butter
  • 1/2 cup all-purpose flour
  • 2 eggs, lightly beaten
  • 1/2 cup milk
  • 1/2 teaspoon salt, divided
  • 2 cups fresh broccoli florets
  • 1 cup chopped green pepper
  • 1 cup chopped tomato
  • 1/2 cup chopped red onion
  • 2 tablespoons water
  • 1/8 teaspoon pepper
  • 1-1/2 cups (6 ounces) shredded cheddar cheese
Directions:
  1. Place butter in a 9-in. pie plate or cast iron skillet; heat in a 450° oven until melted. Carefully tilt pan to coat bottom and sides. In a large bowl, beat the flour, eggs, milk and 1/4 teaspoon salt until smooth. Pour into pie plate. Bake for 14-16 minutes or until puffed around the edges and golden brown.
  2. Meanwhile, in a large skillet, cook the broccoli, green pepper, tomato and onion in water for 8-10 minutes or until crisp-tender; drain well. Add pepper and remaining salt.
  3. Sprinkle 1/2 cup cheese over pancake; top with vegetables and remaining cheese. Bake 3-4 minutes longer or until cheese is melted. Cut into four wedges; serve immediately. Yield: 4 servings.
recipe from Taste of Home

Of course, this is just the basic recipe.  The lady who submitted the recipe to Taste of Home said that they like to vary the vegetables depending on what's in season, so...

I used 1/2 a medium onion, 1 green pepper, 2 cups chopped zucchini, 2 handfuls chopped chard, and 3 Roma tomatoes - all things chopped, whether I said so or not.  Everything but the onion came straight out of my garden!  Instead of cooking the vegetables in water, I sauteed everything in a little olive oil starting with the onion and pepper, and then adding the zucchini and chard and finally the tomatoes when everything else was mostly cooked.

4 servings?  Really?  Jeffrey and I ate the whole thing ourselves.  We really liked it.  I thought maybe it had too much cheese, but Jeffrey thought it was just right.  Next time I want to add a touch more salt to the vegetables, and even though it says to cut into wedges and serve immediately, I think it needs to sit for a few minutes when you take it out of the oven, so the cheese can set up a bit.  Other than that - perfect!  I will definitely be making this again.
 
Enhanced by Zemanta

Tuesday, August 16, 2011

Chocolate Fudge Sauce

Posted on facebook this morning, and I'm thinking I must try this.

Chocolate Fudge Sauce
Fix-It and Forget-It Cookbook Revised and Updated, pg. 252

Makes 1½-2 cups sauce
Prep Time: 10-15 minutes
Cooking Time: 1½ hours
Ideal slow-cooker size: 4- to 5-qt.

Ingredients:
  • 5 squares unsweetened baking chocolate
  • 1 stick (1/2 cup) butter, cut in pieces
  • 5.3-oz. can evaporated milk
  • 3 cups powdered sugar
  • 1½ tsp. vanilla extract
Directions:
  1. Mix all ingredients in slow cooker.
  2. Cover and cook on High 30 minutes. Stir.
  3. Cover and cook up to another hour, or until chocolate and butter are melted and sauce is smooth.
  4. Store in refrigerator.
Cover of Cover via Amazon
Serving suggestions: Serve over ice cream and cake! Or use it as a fondue for fruit!

Variation: Add ½ cup smooth or chunky peanut butter to Step 1.

Looks yummy, huh?
 
Enhanced by Zemanta

Thursday, August 4, 2011

Lazy Day Pasta

The original recipe is called Lazy Day Mostaccioli, though I usually use penne - which is basically shaped the same.  You throw the pasta in without boiling it first and can prepare this early in the day or the night before - whenever you have time, and it's ready to bake at dinner time.

Here's how I made it yesterday:

Lazy Day Mostaccioli

Ingredients:
  • 1/2 lb. ground beef
  • 1/2 a medium onion, chopped
  • 8 oz. chopped mushrooms
  • 1 tsp. Italian seasoning
  • 1 26 oz. can of spaghetti sauce
  • 1 can of diced tomatoes
  • 2 cups cottage cheese
  • 1 tsp. oregano
  • 1 egg
  • 8 oz. mostaccioli noodles (or penne)
  • 1 lb. mozzarella cheese, shredded
  • Chopped chard, sauteed in olive oil
  • Parmesan cheese
Directions:
  1. Cook ground beef with onion until brown. Add chopped mushrooms and cook until beef is well browned and mushrooms are done; stir in Italian seasoning.  Add sauce and tomatoes and simmer 20 minutes.  
  2. While this is simmering, saute chard in olive oil until it starts to wilt.  Add a bit of water, cover, and cook until done.
  3. Mix together the cottage cheese, oregano, and egg; set aside.  
  4. Grease 13"x9" pan.  Now start layering - about 1/3 of the meat sauce, 1/2 the noodles, 1/2 the cottage cheese mix, 1/2 the chard, and a light layer of cheese (about 1/3).  Repeat.  Then layer on the rest of the meat sauce and the rest of the cheese.  Sprinkle Parmesan over all.  Add 1/2 cup water over the top.  Let sit for at least 1 hour or overnight in the refrigerator.  
  5. Bake at 350° for 50 minutes or until brown and bubbly.  Let sit 10 minutes before serving.

Follow the instructions the first time.  If too watery, decrease water to 1/4 cup, if too dry, add 3/4 cup water.

The original recipe called for 1/2 lb. hamburger and 1/2 lb. sausage, and a 10 oz. package of frozen spinach.  I used the mushrooms because I had some that needed used and the chard because I have plenty of it coming out of the garden, so I might as well use it.  It turned out so good!

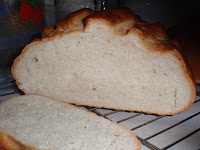
I served it with zucchini (also from the garden and sauteed in olive oil) and fresh homemade sourdough bread.  Perfect!

Tuesday, July 19, 2011

Cranberry Daiquiri Slush

Ocean Spray linked to this recipe on facebook today, and it looked so good I just had to try it. In the freezer now. Hopefully they're as good as they sound.

Cranberry Daiquiri Slush

Ingredients:
  • 2 cups Ocean Spray® Cranberry Juice Cocktail
  • 1/2 cup lemon juice
  • 1/2 cup lime juice
  • 1/2 cup sugar (or to taste)
  • 1/3 cup rum
Directions:
  1. Combine all ingredients in an 8-inch square non-metal pan; stir until sugar is dissolved. Cover and freeze 6 hours or overnight.
  2. To serve, scrape a fork over the surface of the frozen mixture and spoon a heaping 1 cup into a 10 oz. glass. Add a little more cranberry cocktail and stir to form slush. Makes 6 servings.

We had some of the new Cranberry Juice Cocktail with a Hint of Lime, so I used that.  I only had 1 lime, which gave me about 1/4 cup juice, so I made up the difference with lemon juice.
Enhanced by Zemanta

and some more drink recipes to try:

Thursday, July 14, 2011

Chard Mashed Potatoes

Fresh Swiss chardImage via WikipediaI was talking to a friend this past weekend, and she was looking for some new ways to use some of the chard from her garden.  I mentioned these mashed potatoes because this is one of my favorite chard recipes.

Chard Mashed Potatoes
  • 2 1/2 to 3 lbs. russet potatoes, scrubbed
  • 2 to 3 tsp. salt
  • 1 large bunch Swiss chard
  • 1 Tbs. olive oil
  • 1 clove garlic, minced
  • 1/2 to 3/4 cup hot milk or half-and-half
  • 2 to 3 Tbs. unsalted butter, room temperature
  • Freshly grated Parmesan cheese, for garnish, optional
  1. Peel potatoes, leaving some skin on each. Cut potatoes into large chunks, and place them in medium pot with enough cold water to cover. Add 2 tsp. salt, and bring to a boil. Reduce heat slightly and boil until potatoes are tender, about 12 minutes.
  2. Meanwhile, rinse chard well. Remove and discard stems and chop leaves coarsely. In large skillet, heat oil over medium heat. Stir in chard and garlic. Cover pan, and cook, until wilted and tender, stirring occasionally, 3 to 4 minutes. Remove from heat.
  3. When potatoes are done, drain and add milk and butter. Mash potatoes, leaving them slightly lumpy, adding salt and pepper to taste. Stir in chard and serve, garnished with Parmesan if desired.

So good!  Hopefully I'll have enough chard from my own garden to make this soon.  I cut a few small leaves yesterday, enough to make a really yummy pasta dish for lunch - chard sauteed in olive oil w/ sliced green onions and minced garlic, sea salt and fresh ground pepper, then tossed with pasta and topped with Parmesan. Yum!  But my chard is going to have to grow a bit before I have any more, and the bunnies are going to have to leave it alone!
 
Enhanced by Zemanta

Monday, July 11, 2011

Free Cookbooks

Here are some free cookbooks I found this evening.  The first two are in .pdf format so you can download them to your computer or upload them to Google Docs, like I did.

and I don't know if you can download it, but this one is just very cool! Gold Medal Whole Wheat Baking.

The recipes in all of them look really good!  I am definitely going to have to try some of them.

This recipe for Mojito Bars from the Spring Cookbook really looks yummy - and appropriate, too since I read somewhere that today is National Mojito Day.  Did you even know there was such a thing?  It's a shame I almost killed my mint plant and don't have enough leaves to actually make a mojito today!
 

  © Blogger template 'Totally Lost' by Ourblogtemplates.com 2008 - Header credit: Steve Wampler

Back to TOP