bcmom's kitchen

bcmom's kitchen

Wednesday, December 22, 2010

Reese's Bars

365.125 - Reese's Peanut Butter Cups
Reese's Peanut Butter Cups
(Photo credit: nettsu)
This is for my daughter Beth. If you like Reese's Peanut Butter Cups, you'll like these. A lady I used to work with brought these to a potluck at work one time, and we all had to have the recipe!

Reese's Bars
  • 1 package graham crackers (crushed)
  • 4 cups powdered sugar
  • 2 sticks melted butter
  • 1-1/3 cups peanut butter
  1. Mix ingredients well and press firmly into greased 13x9" pan.
  2. Melt 12-oz bag of chocolate chips and spread on top.
  3. Chill until chocolate is set, then cut and put back into refrigerator.  Be sure to cut around the edges, too.

I'm thinking I'm going to have to make a pan of these soon.
Enhanced by Zemanta

Saturday, December 11, 2010

Baking for the Troops

I shared this on my other blog, but I thought I'd mention it here, too.  Kenmore and The Food Network’s Sunny Anderson have launched Kenmore “Baking for the Troops” to send up to 250,000 cookies to deployed troops with messages of support from Americans.  To participate, all you have to do is visit Kenmore's Facebook page and ask them to bake and send a dozen cookies on your behalf.  You'll also be able to choose from several messages of encouragement to send along with your cookies.

To make the deal even sweeter, when the goal of 250,000 cookies has been met, Kenmore will donate $50,000 to Heroes at Home Wish Registry to assist military families in need stateside. So, please - go ask Kenmore to donate some cookies for you, and then enjoy these baking tips from Sunny Anderson.

Baking tips:
  • A baker’s golden rule: read all recipes before you begin.
  • Invest in an oven thermometer. Baking is a science and a proper oven temperature can be the difference between good and great cookies.
  • Ice cream scoops and melon ballers are great for measuring cookies so they are identical in size.
  • Softened butter keeps its shape but allows dents with your finger. It also softens faster when placed on metal or aluminum.
  • To store cookies, allow to completely cool then contain. If done before they’re cooled the cookies will either be too soft or brittle depending on the recipe.
  • To stack sticky or soft cookies, use parchment paper, a muffin tin or cupcake liners.
  • Cookie dough can survive in the freezer up to three weeks if properly wrapped and sealed.

Monday, November 29, 2010

Apple Pie Liqueur

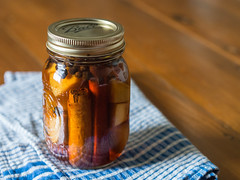
Apple cinnamon whiskeyLast fall we bought a bottle of Apple Pie Liqueur, which we really enjoyed.  We shared some with a friend, and he said it tasted just like some he made at home - Grandma's Apple Pie.  There are several recipes for apple pie liqueur online, different variations, but they all look pretty much the same - apple cider, spices and alcohol.  Today I followed my friend Mike's recipe and finally got around to making some apple pie liqueur of my own:

Grandma's Apple Pie (Liqueur)
  • 1 gallon apple cider
  • 1 quart apple juice
  • 1 cup sugar
  • 7 cinnamon sticks
Boil all ingredients, cover and cool to room temp.  When cool, add 1 pint of Everclear.  Then you just need to bottle and enjoy.

Some of the recipes I found online say to bottle and age 1 month, so I'm not entirely sure if it's ready yet or if I need to let it sit.  But, it made a lot - I probably should have made a half recipe!  We have the original Apple Pie Liqueur bottle from last year re-filled, along with a Jack Daniels bottle, another whiskey bottle, a Mason jar - all full, and about half a pint jar.  So, even if I can't wait to get into some of it, there will be plenty that will age way more than a month.  If you've made this before, let me know how you do it.

We just drank the bottle we bought, either room temperature or slightly warmed. It was really good that way, but I hear there are some good cocktail recipes I might have to try, too.

Related Recipes

Tuesday, November 16, 2010

Peasant's Offering

Another recipe from my favorite cookbook, The Best of Mennonite Fellowship Meals.

Peasant's Offering

Ingredients:
  • 2 T cooking oil
  • 1 medium onion, diced
  • 1 lb. lean ground beef (or turkey)
  • 1 medium head cabbage, grated
  • 2-1/2 tsp. salt
  • 1/2 tsp. black pepper
  • 1 tsp. paprika
  • 1 cup sour cream
  • 5-6 large potatoes
  • 1 cup milk or less
  • 1 T butter
  • Chopped parsley or chives
Directions:
  1. Heat cooking oil in very large skillet. Add onion and saute lightly. Add ground beef and stir to keep meat loose and fine. cook just until pink disappears.
  2. Gradually add grated cabbage, stirring until all cabbage is well cooked. Add seasonings adjusting to taste. Remove from heat.
  3. Stir in sour cream. Spoon into rectangular baking dish (13X9) and spread evenly over bottom. Keep hot in oven.
  4. Dice and cook potatoes. Mash with milk and butter until desired consistency. Layer mashed potatoes over cabbage mixture.
  5. Garnish with chopped parsley or chives and serve.

This is always really popular at potlucks. I usually spoon the meat and cabbage mixture into my crockpot, layer the mashed potatoes on top, and turn it on low to keep it warm. If I'm fixing this at home, I usually just leave the meat and cabbage mixture in the skillet and put that in the oven to keep it warm. Then layer the mashed potatoes on top and serve. I usually completely forget about the parsley or chives, but I figure they're more for looks than anything - and no one seems to care.

Apple-Pecan Muffins

I found this recipe in the food section of my Sunday paper, though I'm not sure when. I finally made them, and they were quite good.

Apple-Pecan Muffins

Ingredients:
  • 2 cups flour
  • 1/3 cup sugar
  • 1 T baking powder
  • 1/2 tsp. salt
  • 1/2 tsp. cinnamon
  • 1 egg
  • 1 cup milk
  • 3 T melted butter or vegetable oil
  • 1 medium tart apple (peeled and cored)
  • 1/4 cup finely chopped pecans
Directions:
  1. In large bowl, stir together flour, sugar, baking powder, salt and cinnamon.
  2. In medium bowl, beat egg with milk and melted butter.
  3. Shred the apple directly into egg mixture; stir to blend. Combine egg mixture with flour mixture, stirring just until flour is moistened. Do not overmix.
  4. Lightly grease a muffin pan with 12 (2-1/2 inch) cups or use paper muffin cups. Spoon batter into muffin pan. Sprinkle top of each muffin with 1 tsp. chopped pecans
  5. Bake in preheated 400 ° oven until well browned, 25 to 30 minutes. Serve warm.

Thursday, November 11, 2010

To Print all These Recipes, You Need Cheap Printer Cartridges

I've tried to include a printable copy of all the recipes on this blog, because running back and forth between the computer and the kitchen when you're trying to cook up a masterpiece in the kitchen is just not practical.  It's also not practical to print the original post when all you want is the actual recipe and none of the extra text or images that are also on the page.
 
I really want to play with the style code I found on another recipe blog I like.  They have it set so when readers print a post, they just get the text and no images.  They may even have it set so that all that prints is the recipe, but I'm not completely sure about that.  I haven't had time to really look into it.  In the meantime, I've been using Google Docs for my printable recipes, and that seems to be working really well.  Besides making the recipes easy to print, it also gives me a back-up copy of all my recipes - and half the reason I started this blog is so that I can store my recipes and not lose them.
 
And I really do use the recipes on this blog.  Have I used my own  'Print this recipe' link on all of them?  No.  Sometimes I go back and forth between my computer and my kitchen, and sometimes I jot down the ingredients on an old envelope.  I would probably save myself lots of time and hassle if I just printed them when I posted them, but I keep thinking about all that printer ink I'd be using.  When it's time to replace the ink cartridges, I always look for cheap printer cartridges HP to get the best deal possible.  Free shipping, coupons codes, I combine everything I can, so I'm not sure what I'm worried about.  I should be able to print as many recipes as I want - and you should too.  Print all my recipes.  Go ahead.  You know you want to.
 

This post brought to you by Cheap Printer Cartridges

Friday, October 29, 2010

Forever Bags

I grabbed some Forever Bags at Menards a couple weeks ago.  They were free after rebate, so I thought it was the perfect time to try them.  The first thing I tried was bananas.

I had 6 bananas in one bunch, so I put 3 of them in one of the bags and left the other 3 out on the counter.  After 5 days, my bananas looked like this:


So, there was definitely a difference. Unfortunately, I stopped paying close attention after that.  I left the bananas in the bag for several more days, and then I noticed that they were turning a little brown - and they were soft.  They weren't as brown as the bananas that weren't in the bag, but they were just about as soft - so I'm not really sure the bag made much of a difference really.

It wasn't a huge problem. I just made some banana muffins.

I'm really interested in seeing how these bags work on other things.  Right now I have some bell peppers in one and some chard in another one.  We'll see how well things keep.

Wednesday, October 27, 2010

Oatmeal Apple Muffins

I made these Monday, and I love them!  Oatmeal, apples, cranberries, what's not to love?  They've also got whole wheat flour, walnuts, and cinnamon so they're good for you, too.  Seriously - so many good-for-you ingredients in one muffin!
 
Oatmeal Apple Muffins 
 
Ingredients:
  • 1 egg
  • 3/4 cup milk
  • 3/4 cup oil
  • 1/3 cup sugar
  • 1 medium apple, peeled and chopped
  • 3/4 cup dried cranberries (or raisins)
  • 1/2 cup walnut pieces
  • 1 cup whole wheat flour
  • 1 cup quick-cooking oats
  • 1/4 tsp. salt
  • 1 T. baking powder
  • 1/2 tsp. nutmeg
  • 2 tsp. cinnamon
Directions:
  1. In a bowl, beat together egg, milk, oil and sugar.
  2. In a large bowl, combine remaining ingredients.
  3. Fold egg mixture into dry mixture, just to moisten.
  4. Fill muffin tins 3/4 full.
  5. Bake 15 to 20 minutes at 450°

Good with or without butter!
Enhanced by Zemanta

Friday, October 22, 2010

Turkey Tetrazzini

We had this for dinner this week, and it was yummy!
 
Turkey Tetrazzini
 
Ingredients:
  • 8-oz. package noodles
  • 1 onion, chopped
  • 1/3 cup chopped celery
  • 1/3 cup chopped green pepper
  • 3 T. butter
  • 3 T. flour
  • 1 t. salt
  • Pepper to taste
  • 1 cup milk
  • 2 cups turkey broth
  • 1 cup shredded cheddar cheese
  • 2 cups chopped cooked turkey
  • 1 cup buttered bread crumbs
Directions:
  1. Cook noodles according to package directions. Drain.
  2. Saute onion, celery and green pepper in butter. Add flour, salt and pepper. Add milk and broth and cook until thickened. Stir in cheddar cheese. Add noodles and turkey to this mixture.
  3. Spoon into greasted casserole dish and cover with bread crumbs.
  4. Bake at 350° for 40 minutes.

I found the original recipe in my favorite cookbook, The Best of Mennonite Fellowship Meals. The recipe was for Chicken Tetrazzini, but I had turkey, so that's what I used. You can use either one based on what you have and what you like.

Cinnamon Swirl Bake

I found this recipe in a magazine and just had to try it.

1-Dish Cinnamon Swirl Bake
Batter
  • Mazola PureTM Cooking Spray
  • 1-1/2 cups all-purpose flour
  • 2 envelopes Fleischmann's® RapidRise Yeast
  • 1/4 cup sugar
  • 1/4 teaspoon salt
  • 2/3 cup milk (very warm 120-130°F)
  • 2 tablespoons butter OR margarine, melted
  • 2 tablespoons corn oil
  • 1 egg
Cinnamon Mixture
  • 3 tablespoons butter OR margarine, softened
  • 3/4 cup brown sugar
  • 1-1/2 teaspoons ground cinnamon
Icing
  • 1 cup powdered sugar
  • 1 to 2 tablespoons milk
  • 1 tablespoon butter OR margarine, melted
  • 1/2 teaspoon pure vanilla extract
MIX batter ingredients together in a pre-sprayed 8x8-inch baking dish. Let rest for 10 minutes. Combine cinnamon mixture in a small bowl by mixing with fork.
TOP batter evenly with cinnamon mixture. Using fingers, poke topping thoroughly into batter.
BAKE by placing in a COLD oven; set temperature to 350°F. Bake 25-30 minutes, until lightly browned and firm in center. Cool 10 minutes. Combine icing ingredients and drizzle over warm cake.
Recipe Note: If desired, batter may be mixed in a separate bowl. Proceed as directed above.

I don't have any Rapid Rise yeast, so I just used regular yeast and only 1 package or 2-1/4 tsp. I let it rest for an hour, instead of the 10 minutes, then spread the brown sugar cinnamon mixture on top and poked it in. Then I covered it with plastic wrap and put it into the refrigerator. The next morning I pulled it out, let it sit for about half an hour to come to room temperature, and then baked as directed. I baked it for about 5 extra minutes.


The icing was really good, but I made it a bit thick so ended up spreading it on instead of drizzling.  I think there was enough icing for a double batch, so next time I'm either making less icing or making more cake!  I really liked the flavor, though, and I'm thinking of using this icing recipe for my cinnamon rolls next time.  The butter just added something. 

Also, next time I will follow the Recipe Note and mix it in a separate bowl.  I can't figure out the reason for spraying the pan and then mixing the dough in it.  I will definitely be making this again - it was so good!

Tuesday, October 19, 2010

Using My Garden Produce

I had some beautiful red peppers from my garden this year. Adding them to my zucchini was not only yummy, but pretty, too!

  • Saute sliced onion and sliced red pepper in olive oil. 
  • Add sliced zucchini and cook until done.  
  • Season with salt and pepper to taste. 
The next day I was looking for something for lunch, had a bit of the zucchini left, some roast beef that needed used, and some chard from the garden...


With the leftovers:
  • Cook sliced chard (7 leaves or so) in olive oil until done.  Season with salt and pepper. 
  • Slice roast beef and add to skillet; heat through. 
  • Add zucchini mixture and cook until heated, stirring frequently. 
  • Sprinkle with feta cheese.
Yum! 

I tried making the zucchini, chard and roast beef for dinner one night by slicing uncooked beef and cooking that in olive oil with the onion and pepper then adding the zucchini and chard - but I didn't like it as well.  The peppers and onions didn't cook the same way or something.

I've still got chard in the garden, but everything else is finished, so I'll have to wait until next summer to make this again.  Posting this now so I don't forget!

Monday, October 18, 2010

Sweet Potato Chips

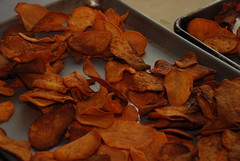
sweet potato chipsImage by kthread via FlickrMy son Cory has been getting more leg cramps than usual, and he was looking for a good source of potassium that might help him.  Ordinarily, he'd eat bananas, but for some reason bananas make him feel bad, so he needs something else.  I searched for some good sources of potassium and found that sweet potatoes have the most.  Unfortunately, he can't just find a baked sweet potato on campus, so I'm thinking of buying him some sweet potatoes and making these sweet potato chips.  They're something he can have handy in his dorm room.

Baked Sweet Potato Chips

Ingredients
  • 1 large sweet potato peeled 
  • 2 tsp vegetable oil    
  • 1/8 tsp table salt, or to taste   
Instructions
  • Preheat oven to 400ºF. Spray 2 baking sheets with cooking spray.
  • Thinly slice potatoes in a food processor or by hand; they should be no more than 1/8-inch thick.
  • Arrange slices on baking sheets so they don’t overlap. Brush with oil and sprinkle with salt. Bake chips until they begin to lightly brown, about 15 minutes. Cool on a rack and serve.

 I'm also thinking that I'll try using some other seasonings besides salt, just to spice them up a bit. The problem is, he'll probably go through them really fast - or I might not want to share them with him once I make them.  Or I just might make these Spicy Baked Sweet Potato Fries w/ Honey Cranberry Mustard for me.  I won't have to share, because these won't keep in a dorm room!
Enhanced by Zemanta

Tuesday, September 14, 2010

Ninja Recipes

My Ninja came with a small recipe book.  I was cleaning the house up, straightening things, organizing clutter, putting things away, etc.  And now I don't know where the book went.  I know it's around here somewhere.

Thankfully, all the recipes are also available online - Ninja Kitchen Recipes - so I can still find them.

Sunday, September 12, 2010

Spicy Fish Recipe

Anther recipe I found on Flickr. I saved this to my favorites and then forgot about it. Maybe this way I'll remember to try it.

Spicy Fish Recipe

2 fillets white fish (frozen mahi mahi used here)
1/2 cup chopped chili peppers
1 sweet yellow onion, sliced
1 tomato, sliced
1/4 cup chopped cilantro
2 tbsp oil (olive oil used here)
1/4 cup soy sauce
1/4 cup shaved ginger

marinate / thaw fish by soaking in ginger, soy sauce, and add water to cover fish
saute onions, garlic in oil
add hot peppers to pan, cook until soft
add fish (include some ginger if you like), cilantro, cook until fish is opaque
add tomato and serve

(I'll make it purty later)

Lemonade

Lemonade
Lemonade,
originally uploaded by jamieanne.
I found this recipe (and pic) on Flickr a while back.  It takes a bit more time than the frozen lemonade that comes in a can, but it's so much better! Unfortunately, everyone likes it, and I don't want to share!

Lemonade
 
Ingredients
  • 1 1/3 cup sugar
  • Zest of 3 lemons (no pith!)
  • 2 cups boiling water
  • 4 cups cool water
  • 1 1/3 cup lemon juice (approximately 6 lemons)
  • 5 or 6 strawberries (optional)
  • ice cubes
Preparation
  1. Pour the sugar and the lemon zest into an empty pitcher. Pour the 2 cups boiling water onto the sugar and lemon zest and stir until sugar is dissolved. Pour in the 4 cups cool water, then pour in the lemon juice and stir. I usually pour the lemonade through a strainer to take out the lemon zest.
  2. For strawberry lemonade, put the strawberries into a blender, along with a cup or so of the lemonade and blend until juiced. I strain this as well to get rid of the strawberry seeds. Then pour the strawberry-lemonade mixture into the pitcher along with the rest of the lemonade, and there you have it!
  3. Refrigerate until cold, and drink with ice cubes!

Friday, September 10, 2010

Craisins Breakfast Bars

I was looking up the juice I used in our smoothies this morning - the Ocean Spray Fruit & Veggie Tropical Citrus Blend - try it, it's amazing!  Anyway, while on the Ocean Spray web page, I saw this recipe, which I had to grab so I won't forget to make these.  They look amazing.

CRAISINS® BREAKFAST BARS

INGREDIENTS:
  • 1/4 cup vegetable oil
  • 2 tablespoons orange juice
  • 2 teaspoons grated orange zest
  • 1 large egg
  • 1 cup quick-cooking oats
  • 1 cup round toasted oat cereal
  • 2/3 cup Ocean Spray® Craisins® Blueberry or Pomegranate Juice Infused Dried Cranberries
  • 1/2 cup wheat germ
  • 1/2 cup sunflower kernels
  • 1/3 cup packed brown sugar
  • 1/4 cup all-purpose flour
  • 1/4 teaspoon salt
  • 1/4 teaspoon baking soda

DIRECTIONS:

Preheat oven to 325°F. Line 8-inch square baking pan with foil; spray foil with cooking spray.

Whisk together oil, orange juice, orange zest and egg in small bowl.

Combine remaining ingredients in large bowl; mix well. Pour in oil mixture; stir until all ingredients are moistened. Pour mixture evenly into prepared pan; press firmly. Bake for 30 to 35 minutes or until deep golden brown and set. Cool in pan for 15 minutes. Remove from pan by lifting foil; remove foil. Cut into bars while still warm. Serve warm or cool completely.

Makes 8 bars.

TIP: This mixture is a little sticky. To easily press into pan, spray bottom of metal measuring cup with cooking spray and press mixture with measuring cup.

Wednesday, September 1, 2010

Smoothie Recipes

Now that we've got the Ninja, we're thinking we need to have smoothies more often. I made some this weekend with orange juice, a banana, and some frozen strawberries - using one of the recipes in the recipe booklet that came with the Ninja.  They were pretty good, and we decided we need to keep more frozen fruit around so we can make smoothies any time we want.  So when I went shopping today I grabbed a big bag of frozen fruit.  I already have frozen bananas, and I got some vanilla yogurt too, since some of the recipes in the booklet call for that, too.

Also, I just quickly searched for 'Smoothie Recipes' online and found this entire list of smoothie recipes. And that's just one of the sites that came up! I'm looking forward to trying a few of these.

Friday, August 27, 2010

We Ninja'd Some Salsa Today!

A while back I found this recipe for the world's easiest ice cream, which I still haven't tried, but I'm going to. I shared the link on Facebook, and one of my friends said she wanted one of those Ninjas. Ninjas? What? So I went back to the recipe and checked out the Ninja, read the reviews, and decided I wanted one, too.  I've been toying with buying a Vita-Mix for the last several years at the State Fair, but I'm just too cheap to get one.  Some of the people who reviewed this said they liked the Ninja better than the Vita-Mix, and my brother who has a Vita-Mix said they mostly use it for smoothies and ice cream - and they do use it several times a month, but not as often as they could.  So, when I weighed the cost and the potential use, I figured $40 (w/ shipping) for the Ninja (with an extra pitcher and extra 2-cup bowl, found new on ebay) was a lot better than $450 for the Vita-Mix.


My Ninja came in the mail yesterday, and I just had to try it today. First Cory and I crushed ice and made some iced coffee - yum! And then I made some salsa!

Fresh Ninja Salsa

Ingredients:
  • 4 Roma tomatoes, cut in 4 pieces
  • 1/4 small onion
  • 2 hot peppers, split and deseeded
  • 1/2 tsp. salt
  • juice from 1/2 lemon
  • pinch of oregano
  • pinch of cumin
Directions:

Add all ingredients to the bowl. Use short pulses, about 3 times or until desired consistency is reached.

Serve with tortilla chips. Makes about 2-1/2 cups.

I pretty much followed the recipe in the book that came with my Ninja - except I used two hot peppers (because Cory wanted them) instead of 1, I didn't use the 1/2 tsp. sugar, and I didn't have a lime so I used lemon juice - cut a small half and didn't squeeze all of the juice out. Also, the recipe called for cilantro, which would have been so good in this, but I didn't have any. Even without it, this salsa was amazing - and so easy!

Enhanced by Zemanta

Thursday, August 26, 2010

Zucchini Hamburger Pie

We had this for dinner tonight. Since I have zucchini from the garden and tomatoes from the garden, it's only right to use them. This has a really nice flavor.

Zucchini Hamburger Pie

Ingredients:
  • 1/2 lb. ground beef
  • 1/4 cup chopped onion
  • 1 tsp salt
  • 1/2 tsp. garlic salt
  • 1/2 cup diced green pepper
  • 1 tsp dried oregano
  • 1 tsp dried parsley flakes
  • 1/2 cup bread crumbs
  • 1/4 cup Parmesan cheese
  • 1 egg; lightly beaten
  • Single pastry crust
  • 4 cups sliced zucchini; divided
  • 2 medium tomatoes; thinly sliced
Directions:
  1. Brown meat with onions, salt and garlic salt; drain. Stir in green pepper, oregano, parsley, bread crumbs, Parmesan cheese, and egg until well mixed; set aside.
  2. Spread 2 cups zucchini in pie pan or casserole dish; cover with meat mixture. Top with tomato slices and rest of zucchini. Cover with pie crust, cutting steam vents.
  3. Put into preheated 350° oven and bake 1 hour or until crust is lightly browned.

The original recipe called for a double pastry crust, but there seems to be too much liquid in the filling so that the bottom crust turns out soggy. It is better with just the top crust.

this post has been edited to add a picture! (especially for Tisha)

Friday, August 20, 2010

Guess What We're Having

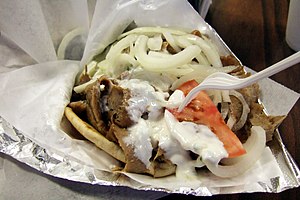
A gyro sandwich with meat, onions, tomato, and...Image via WikipediaToday I made Pita Bread:

Pita Bread
Ingredients:
  • 1 package of yeast (2-1/4 t.)
  • 1/2 cup warm water
  • 3 cups all purpose flour
  • 1 1/4 teaspoon salt
  • 1 teaspoon granulated sugar
  • 1 cup lukewarm water
Preparation:
Dissolve yeast in 1/2 cup of warm water. Add sugar and stir until dissolved. Let sit for 10-15 minutes until water is frothy.
Combine flour and salt in large bowl. Make a small depression in the middle of flour and pour yeast water in depression. Slowly add 1 cup of warm water, and stir with wooden spoon or rubber spatula until elastic.
Place dough on floured surface and knead for 10-15 minutes. When the dough is no longer sticky and is smooth and elastic, it has been successfully kneaded.
Coat large bowl with vegetable oil and place dough in bowl. Turn dough upside down so all of the dough is coated.
Allow to sit in a warm place for about 3 hours, or until it has doubled in size.
Once doubled, roll out in a rope, and pinch off 10-12 small pieces. Place balls on floured surface. Let sit covered for 10 minutes. Preheat oven to 500° F. and make sure rack is at the very bottom of oven. Be sure to also preheat your baking sheet.
Roll out each ball of dough with a rolling pin into circles. Each should be about 5-6 inches across and 1/4 inch thick.
Bake each circle for 4 minutes until the bread puffs up. Turn over and bake for 2 minutes.
Remove each pita with a spatula from the baking sheet and add additional pitas for baking.
Take spatula and gently push down puff. Immediately place in storage bags.

and Cucumber Sauce:

Cucumber Sauce
Ingredients
  • 8 oz. plain yogurt (not low-fat)
  • 1 medium cucumber
  • 1/8 teaspoon white pepper or 1/2 teaspoon black pepper
  • 1 teaspoon salt
  • 1 teaspoon white sugar
  • 2 tablespoon dill
  • 2 peeled garlic cloves, finely minced
  • Juice of 1/2 lemon
Method
Place 1 medium cut up cucumber in a chopper (peel skin, remove pulp and seeds as they are very bitter,) chop until finely chopped. Spoon out on paper towels to soak up as much moisture as possible, place the chopped cucumber in a small bowl then stir in 2 finely minced garlic cloves, juice of ½ lemon, 1 teaspoon salt, 1 teaspoon sugar, ½ teaspoon black pepper, 2 tablespoon dill. Pour off any water from the yogurt and blend in 8 oz, regular yogurt (not low fat) do not over-mix. Cover bowl and immediately place in refrigerator and let set undisturbed for 24 hours so the ingredients will blend and sauce re-thicken (keep chilled when not in use.)
Makes about 2 cups

Notes about the recipes to be added later, once we've actually tried them.  For now I've just copied the recipes.

Enhanced by Zemanta

Friday, August 6, 2010

Ratatouille

I've got lots of zucchini and peppers from the garden, and I bought some eggplant from the Farmers' Market this week so I could make this. And it is so good.

Ratatouille

Ingredients:
  • 1/2 cup olive oil
  • 1 large onion, diced
  • 1 large garlic clove, minced
  • 1 medium eggplant, cut in 1-inch pieces
  • 1 large green pepper, cut in 1-inch pieces
  • 3 medium zucchini, cut in 1-inch-thick slices
  • 1/2 cup water
  • 1 T salt
  • 2 t. oregano leaves
  • 1 t. sugar
  • 1 can diced tomatoes
Directions:
  1. In 6-quart Dutch oven or saucepot over medium heat, cook onion and garlic in hot olive oil until tender, about 10 minutes, stirring occasionally.
  2. Add eggplant and the green pepper; cook for 5 minutes, stirring frequently.
  3. Stir in zucchini, water, salt, oregano and sugar; heat to boiling.  Reduce heat to medium-low and cook 10 minutes.
  4. Stir in tomatoes and cook for an additional 20 minutes or until vegetables are tender, stirring occasionally.  Serve hot or follow step 5.
  5. Cover vegetable mixture and refrigerate to serve cold later.

The original recipe actually said to cut the garlic clove in half and then discard it prior to adding the eggplant and green pepper.  Not a chance.  I just minced it and left it in.  Also, I used one large zucchini and substituted the can of diced tomatoes for the 2 fresh tomatoes (cut in wedges and added at the very end) called for in the original recipe.  My tomatoes are just now starting to ripen, so I didn't have any to use yet.

I let this cool down to refrigerate for tomorrow.  I'm trying to decide whether I should heat it back up or serve it cold.  I couldn't help myself and ate some when it was lukewarm, and that seemed like the perfect temperature.  What do you think - hot or cold?
Enhanced by Zemanta

Thursday, August 5, 2010

Easy Pesto and Fettuccine

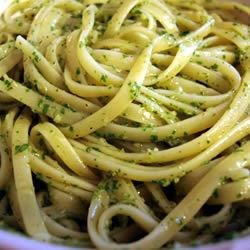
I've got a lot of basil growing in the garden and was looking for a way to use it.  I found this recipe for Easy Pesto on allrecipes.com and changed it a little after reading some of the comments.

Easy Pesto

Ingredients
  • 1/4 cup almonds
  • 3 cloves garlic
  • 1 1/2 cups fresh basil leaves
  • 2 T Parmesan
  • 1 pinch ground nutmeg
  • salt and pepper to taste
  • olive oil
Directions:
  1. Preheat oven to 450°. Place almonds on a pie plate, and bake for 10 minutes, or until lightly toasted.
  2. In a food processor, combine toasted almonds, garlic, basil, nutmeg, salt and pepper. Process, adding olive oil until a coarse paste is formed.  (The original recipe called for 1/2 cup of olive oil, but I didn't measure, just added a little at a time until I got the desired consistency.)
To serve, cook 1/2 box (8 oz.) fettuccine as directed on the package.  Reserving 3/4 cup of the pasta water, drain the fettuccine and then toss it with 1/4 cup of the reserved pasta water, the pesto and a diced tomato or two.  If the sauce seems too thick, add more of the reserved pasta water.

Serve with additional Parmesan and grilled chicken, if desired.
    Enhanced by Zemanta

    Friday, July 23, 2010

    Corn and Black Bean Salad

    I found this recipe at Cooks.com

    Corn and Black Bean Salad
    • 1 (12 oz.) can whole-kernel corn, drained
    • 1 (15 oz.) can black beans, drained & rinsed
    • 1 red bell pepper, finely chopped
    • 1/2 c. green onions, diagonally sliced
    • 1/2 c. red onion, chopped
    • 1 clove garlic, minced
    • 1 med. tomato, chopped
    • 1 Jalapeno pepper, seeded & finely chopped (optional)
    • Cilantro sprigs or red onion wedge, for garnish
    Dressing:
    • 3/4 c. Italian salad dressing
    • 3/4 tsp. hot pepper sauce
    • 1/2 tsp. chili powder
    • 1 tbsp. fresh lemon or lime juice
    • 1 tbsp. fresh cilantro, chopped
    In large bowl, combine corn, beans, bell pepper, green onions, red onion, garlic, tomato, and Jalapeno pepper.

    For Dressing: In a jar with a tight-fitting lid, combine Italian salad dressing, hot pepper sauce, chili powder, lemon juice and chopped cilantro. Close lid. Shake to mix well. Pour dressing over corn mixture. Stir to mix. Refrigerate, covered, at least 6 hours, or overnight. To serve, put corn mixture in attractive salad bowl. Garnish with a few sprigs of cilantro or a thin wedge of red onion.

    I used a green pepper, because I didn't have a red one and also didn't have a red onion, so I just used a regular yellow onion.  I didn't really measure the onions, but had about 1 cup of onion between the green onions and the yellow onion.  I used 1-1/2 tomatoes, because 1 didn't look like quite enough.  2 would have probably been OK.

    I whisked the dressing ingredients together in the measuring cup I used to measure the salad dressing and then poured it on the salad.  When I got everything mixed together, I just felt it was missing something, so I cooked some Basmati rice and added a cup of that.  As far as putting it in an attractive bowl - I'm taking it for a potluck.  I'm just going to take the lid off the container and hope it tastes as good as it looks and smells.

    Also, I'd like to try the dressing as a marinade next time we decide to grill.

    Sunday, July 18, 2010

    Oriental Coleslaw

    I combined a couple recipes to make this.

    Oriental Coleslaw

    Salad:
    • 1/2 head cabbage, thinly sliced and chopped (or shredded)
    • 1 carrot, shredded
    • 1 cup green pepper, chopped
    • 4 green onions, chopped
    Dressing:
    • 1/2 cup oil
    • 2 T vinegar
    • 2 T soy sauce
    • 1 T sugar
    • 1/2 t. pepper
    • 1/4 t. salt
    Directions:
    1. Combine all salad ingredients.
    2. Combine dressing ingredients and pour over salad.
    3. Mix well and refrigerate for several hours.
    4. Serve with chow mein noodles.

    One of the recipes I used also calls for a package of Ramen noodles.  Mix as directed, noodles with the salad and seasoning packet with the dressing.  I did not use the Ramen this time because I only had a couple hours to let the salad chill, so I didn't think the noodles would have time to soften up.  Next time I'm planning to plan ahead better and use the Ramen.  2 T sesame seeds, 2 T sunflower seeds, and 1/2 c. slivered almonds can also be added - or any combination of the 3.

    This is really good with grilled chicken, and makes a good, cool summer meal.

    Monday, July 5, 2010

    Peachy Chicken

    A bottle of vinegar provided by the shop where...Image via Wikipedia
    When we go to Five Guys for burgers and fries, I always put the malt vinegar on my fries.  And I always think this recipe, found on the back of the malt vinegar bottle, looks so good.  I wrote it down once, but then I lost it, so yesterday we went to Five Guys again, and I wrote it down again.  I'm not going to lose it this time.

     Peachy Chicken

    Ingredients
    • 1 (16 ounce) can peach slices, drained and reserve juice
    • 2 1/2 lbs skinless chicken pieces
    • 1 tablespoon vegetable oil
    • 1/4 cup frozen orange juice concentrate, thawed
    • 1/4 cup malt vinegar
    • 1 tablespoon brown sugar
    • 1 teaspoon dried basil leaves
    • 1/2 teaspoon salt
    • 1/4 teaspoon ground cloves
    • 1/4 teaspoon cinnamon
    • 1/8 teaspoon pepper
    • 2 tablespoons cornstarch
    • 2 tablespoons water
    Directions
    1. In large skillet, brown the chicken in the oil.
    2. Combine the reserved peach liquid, orange concentrate, vinegar, brown sugar, basil, salt, cloves, cinnamon, and pepper. Pour over browned chicken. Cover and simmer 25 to 30 minutes, or until chicken is cooked through.
    3. Add peaches; heat. Combine 2 tbsp cornstarch and 2 tbsp water; stir into sauce. Heat, stirring, until sauce is thickened.
    4. Serve chicken and sauce with rice.

    I need to buy some malt vinegar, and then I'm definitely making this.  (I started to buy malt vinegar at the store once, but this recipe wasn't on the bottle, so I didn't buy it.)
    Enhanced by Zemanta

    Friday, June 11, 2010

    Like Coconut?

    Coconut palms protect their fruit by surroundi...Image via Wikipedia
    I know not everybody does, but if you like coconut, you have to check out this list of recipes - all of them using coconut.  Originally I got distracted by the pictures - that strawberry rhubarb pie looks amazing and so do the muffins - but be sure to scroll down the page, because there are so many more coconut recipes.  I'm definitely going to have to try some of them.

    I found all these recipes when I entered the Tropical Traditions Coconut Oil for Hair Treatment Review & Giveaway over at Shelley's Swag.  In order to enter the giveaway you need to check out the recipes and leave a comment letting her know which recipe (or recipes) sound amazing to you.  Sounds easy enough, right?  And you could win hair treatment that leaves your hair smelling good enough to eat!  (Giveaway ends June 24 at 11:59p.m.)
    Enhanced by Zemanta

    Friday, June 4, 2010

    Oatmeal Sourdough Bread

    I made this Oatmeal Sourdough bread once before, using 1 cup of whole wheat flour, and I really enjoyed it.  It was really good in my French Toast Casserole, too.  Yesterday I made it again, with a few adjustments:

    Oatmeal Sourdough

    Ingredients:
    • 1 cup sourdough starter
    • 1 cup cooked oatmeal 
    • 1 ½ cups water, warm
    • 3 T brown sugar
    • 1-1/2 t salt
    • 1 T oil
    • 2 cups whole wheat flour
    • 2 (or more) cups unbleached flour
    Directions:
    1. Combine starter, oatmeal, water, and 1 cup whole wheat flour in a large bowl and let sit for about an hour.
    2. Mix in sugar, salt and oil.
    3. Starting with the remaining cup of whole wheat, add in the flour gradually until the dough comes together into a ball.
    4. Turn out dough onto a floured surface, adding extra flour if necessary, and knead until dough is smooth and somewhat firm. Place into an oiled bowl, cover with a towel or plastic wrap, and let rise at least 4 hours or overnight.  (for overnight, plastic wrap is best)
    5. After the first rise, turn dough out onto a floured surface. Divide in half, cover and let sit for 10 minutes. Form into two loaves and place in greased loaf pans, cover with a towel, and let rise for 1-1 1/2 hours. Preheat oven to 425°F.
    6. Slash dough two or three times with a sharp knife. Bake at 425°F for 30 minutes.

    Yum!  This bread is going to be really good for sandwiches, and toast, and just to eat.
    My mom linked me to this Sourdough Bread recipe a while back, and I tried it. It didn't turn out as well as I would have liked, so I will have to try it again to see if I can make it work.  The flavor was great, but it just didn't rise worth anything.  That may have been because my starter wasn't quite there yet - but it definitely is now.
      Enhanced by Zemanta

      Thursday, May 27, 2010

      Using the Egg Whites

      The verdict is in, and we like the pudding without the egg yolks best.  It tastes better, and I'm more than happy to skip that extra step of adding egg yolks.  So, I won't always have egg whites to use.  But for this time, I went looking for something to do with them and found this whole list of Recipes to Use Left-over Egg Whites.  I ended up freezing the egg whites instead of using them - which I didn't know I could do.  But, when I have time, I think I'm going to make these Coconut and Chocolate Macaroons.

      Coconut and Chocolate Macaroons
      30 Cookies

      From Ready for Dessert (Ten Speed)

      4 large egg whites
      1¼ cups sugar
      ¼ teaspoon salt
      1 tablespoon honey
      2½ cups unsweetened coconut (see note)
      ¼ cup flour
      ½ teaspoon vanilla extract
      2 ounces bittersweet or semisweet chocolate, chopped

      In a large skillet, mix together the egg whites, sugar, salt, honey, coconut and flour.

      Heat over low-to-moderate heat on the stovetop, stirring constantly, scraping the bottom as you stir.

      When the mixture just begins to scorch at the bottom, remove from heat and stir in the vanilla. Transfer to a bowl to cool to room temperature.
      (At this point, the mixture can be chilled for up to one week, or frozen for up to two months.)

      When ready to bake, line a baking sheet with parchment paper or silicone baking mat and preheat the oven to 350 degrees F.

      Form the dough into 1 1/2-inch mounds with your fingers evenly spaced on the baking sheet. Bake for 18-20 minutes, until deep golden brown. Cool completely.

      To dip the macaroons in chocolate, melt the chocolate in a clean, dry bowl set over a pan of simmering water (or in a microwave.) Line a baking sheet with plastic wrap. Dip the bottoms of each cookie in the chocolate and set the cookies on the baking sheet. Refrigerate 5-10 minutes, until the chocolate is set.

      Note: Unsweetened coconut is available in most natural-food shops or you can purchase it online.
      They sound really good!

      Tuesday, May 25, 2010

      How to Cook Real Food

      It seems simple enough. Eat real food. Cook from scratch. Shop locally. But how do you make it happen in your own kitchen? Especially those of us who never learned how to cook — we were raised on microwave suppers, boxed cereals and toaster pastries. We all face the challenges of a modern life – balancing work and parenthood, all the while trying to feed our families healthier meals.

      I recently found out about this online cooking class that will teach you how to prepare nourishing family-friendly meals with simple, step-by-step techniques.  Everything is covered in 12 easy lessons.  You do it all in the comfort of your own home and at your own pace, and you get lifetime access to all course materials.

      Check it out and see if this is something that can help you.  Enrollment closes May 31, and there are limited spaces available.

      How to Cook Real Food: an Online Cooking Course

      Disclosure: I do receive compensation for each enrollment using my affiliate link

      Monday, May 24, 2010

      Chocolate Pudding

      My husband loves chocolate pudding.  Before we got married and even for a while after we were married, he was happy with the instant kind - add some milk, shake it up, and you've got pudding in a few minutes.  In recent years he's decide that he must have the cookin' kind.  He especially likes the 'scum' that forms on top.  I usually buy the large boxes of Jell-O  chocolate pudding at Walmart for $1, but the last several times I've been there, the spot on the shelf has been empty, and last night they had removed the price tag and spread the small boxes into that spot as well.  Maybe they're not going to carry it any more?  I can't bring myself to buy the small box for 84¢ when I know I could get the large one for $1.

      So today I decided to follow the pudding recipe in my cookbook.  It was fairly simple - sugar, cornstarch, cocoa and milk - cook and stir until thickened pretty much like the Jell-O.  But then it has you add egg yolks and cook and stir again, and then add butter and vanilla.  It got me to wondering why I really needed the egg yolks and that extra cooking, so I went looking on the Internet for chocolate pudding recipes without eggs and found this one:

      Chocolate Cornstarch Pudding

      Ingredients
      • 1/2 cup white sugar
      • 3 tablespoons unsweetened cocoa powder
      • 1/4 cup cornstarch
      • 1/8 teaspoon salt
      • 2 3/4 cups milk
      • 2 tablespoons margarine or butter
      • 1 teaspoon vanilla extract
      Directions
       
      In a saucepan, stir together sugar, cocoa, cornstarch and salt. Place over medium heat, and stir in milk. Bring to a boil, and cook, stirring constantly, until mixture thickens enough to coat the back of a metal spoon. Remove from heat, and stir in margarine and vanilla. Let cool briefly, and serve warm, or chill in refrigerator until serving.
      Source: allrecipes

      Jeffrey said the pudding I made tasted good, but I'm thinking that I will try this recipe tomorrow.  Then we can compare the two and see which one is better - and then decide if the extra work is really necessary.

      And now I have to find a recipe for the egg whites...

      Update:  We tried both recipes side by side and decided we liked the way this one tastes better.  So, it's easier and it's better.  This is now my go-to chocolate pudding recipe.  I have it written on a Post-it note inside my kitchen cabinet - the cabinet that contains the cocoa, cornstarch, salt and vanilla.  And no more egg whites to worry about.

      Monday, May 17, 2010

      Check Out Foodierama

      I got an email today about a new foodie website called Foodierama.  Here's what Dave, one of the co-founders, had to say:

      Foodierama is a homepage for foodies based on the idea of serendipity. It's designed as a portal front page containing teasers to the latest posts of a list of hundreds of the best food blogs.  Whenever users enter the page they discover something new and exciting: a new blog, a new recipe or cooking technique etc. In addition, users get a panoramic view of what's going on in the food blog-sphere all on one graphic page.
      I was definitely intrigued so I had to check it out. It looks like a really interesting website with links to all kinds of great recipes and food information on blogs all around the blogosphere.  I didn't spend much time there, but I already discovered a whole blog dedicated to sourdough - Discovering Sourdough - and I look forward to exploring that one.  Also, did you know you can make pizza in the crockpot?  I found this recipe for Slow Cooker Puffy Pizza Casserole and I think I'm going to have to try it.

      What will you find on Foodierama?

      Tuesday, May 11, 2010

      Sun-Maid Raisin Bran Muffins

      Raisin Bran Muffins

      Ingredients:
      • 3 cups whole wheat flour
      • 2 cups toasted bran flake cereal
      • 1 cup toasted wheat germ
      • 1 cup packed brown sugar
      • 21⁄2 teaspoons baking soda
      • 1⁄2 teaspoon salt
      • 2 cups buttermilk
      • 1 cup water
      • 2 large eggs, beaten
      • 1⁄2 cup vegetable oil
      • 1⁄2 cup honey
      • 1⁄4 cup molasses
      • 2 cups Sun-Maid Natural Raisins
      Directions:
      1. COMBINE whole wheat flour, bran flakes, wheat germ, brown sugar, baking soda and salt in a large bowl, mix well.
      2. COMBINE buttermilk, water, eggs, oil, honey and molasses in a bowl; blend well. Add to flour mixture; stir just until dry ingredients are moistened. Fold in raisins.
      3. POUR into glass or plastic container. Cover and store in refrigerator for a minimum of 4 hours and a maximum of 4 weeks.
      4. HEAT oven to 400°F. Grease or line muffin cups with paper baking cups. Spoon 1⁄4 cup batter into cups.
      5. BAKE for 20 to 25 minutes.
      Variations:
      • Oat and Bran Raisin Muffins: Substitute 1 cup oats or 1 cup nugget-type cereal for
        wheat germ. Prepare as above.
        Orange Raisin Bran Muffins: Substitute 1 cup orange juice for 1 cup water. Add 2 teaspoons grated orange zest to batter.

      I made the first variation, substituting rolled oats for the wheat germ.  I also halved the recipe, because this makes a lot and I'm the only one who eats them.  They were really good, though next time I plan to cut the sugar down a little or leave out the molasses, because they were a little too sweet for my taste.  At first I was a little worried because the batter is really thin when you first mix it up, but after refrigerating, it gets really thick.  It's nice to have the batter in the fridge so you can just pull it out and bake muffins when you want some, though I like these best at room temperature and not hot out of he oven.

      You can get this recipe and more at Sunmaid.com.  Browse through 100 Years of Recipes and download recipe booklets from the last century.  They also have printed recipe booklets you can order.  There are some really good looking recipes.

      If only the people in my house liked raisins.

      Wednesday, April 14, 2010

      Cookware Giveaway

      How would you like to win some LeCreuset baking dishes? You could win a 9-inch Square Baking Dish and 5-inch baking dish just by entering over at Make-Ahead Meals for Busy Moms.  I already have a lot of baking dishes, but I wouldn't mind winning these.  They look really nice!

      Giveaway ends April 21st at 9pm EST, so get over there and enter now!

      Tuesday, April 13, 2010

      Flatbread for Peggy

      I made this bread (without yeast) for Peggy.


      Unleavened Spelt Bread

      Mix:
      • 1/2 cup quick oats
      • 1/4 cup spelt flour
      • 2 T. cornmeal
      • 1/4 cup brown sugar
      • 1-1/2 tsp. salt
      • 1 T. butter
      • 1 cup boiling water
      Let sit, stirring occasionally, until mixture cools to lukewarm.
      Gradually add  as much of  2 cups spelt flour as you can.  Turn out onto floured surface and knead with additional spelt flour, unbleached if you have it, until smooth and not too sticky.  Divide into 3 pieces and roll each piece into a circle, approximately 8 inches across.  Place on greased baking sheet that has been sprinkled with a little cornmeal - should be able to get 2 rounds on your sheet.  Prick with a fork and bake at 350 for about 30 minutes, until slightly browned.  Remove from oven and brush tops with butter.

      Cool and enjoy.  Store in gallon-size zipper bags.

      Update 4/11: I doubled this recipe and made 4 rounds from it.
      Enhanced by Zemanta

      Saturday, April 10, 2010

      Layered Chicken Enchilada Casserole

      This is really easy, and tastes good, too. Instead of rolling the enchiladas up, you simply layer everything in.

      Layered Chicken Enchilada Casserole

      Ingredients:
      • 1 tablespoon vegetable oil
      • 1 medium onion chopped
      • 2 1/2 cups cooked shredded chicken
      • 1 (7 oz.) can diced green chiles
      • 1 (1.25 oz.) package taco seasoning mix
      • 8 corn tortillas
      • 1 (15 oz.) can kidney beans drained
      • 2 (8 oz.) cups shredded cheddar cheese divided
      • 16 oz. salsa
      Directions:
      1. Grease 13x9x2-inch baking dish.
      2. Heat oil in large skillet.  Cook onion, stirring occasionally, until tender.  Remove from heat.  Stir in chicken, chiles and seasoning mix.
      3. Layer half of tortillas in prepared baking dish. Top with chicken mixture, beans and 1 cup cheese.  Layer with remaining tortillas.  Top with salsa and remaining cheese.
      4. Bake for 30 to 35 minutes @  350° or until heated through and cheese is melted.

      This recipe is also very good made with hamburger instead of chicken.

      Wednesday, April 7, 2010

      Sourdough Starter

      Once established, a healthy sourdough starter can live forever.  However, because I observe the Days of Unleavened Bread, in which we put all yeast and everything baked with yeast out of our house, I need to start a new one every year when the Holy Days are over.

      I started today, so I thought I'd keep track of all the steps.  I always refer to Sourdough Baking, the Basics, though I've been doing it for a while now.  It's a good place to start.

      Day One:  Mix 1 cup unbleached flour with 1 cup warm water, cover with a cloth, and let sit.  Stir whenever the mood strikes - just because.  I mix mine in an old peanut butter jar.

      Day Two: Pour out 1/2 cup of the mixture and add 1/2 cup warm water and 1/2 cup flour.  Mix well.
      What to do with the 1/2 cup you pour out?  I suppose you could throw it out, but I have a really hard time with that.  So I use it to bake something.  Today I used it to make a loaf of French Bread, mixing the dough in my breadmaker and then forming the loaf to bake in the oven - because it tastes better that way.

      Day Three:  Today my mixture was thick and bubbly, and smelled mildly fermented.  So, it's working!  I stirred it down and let it sit the rest of the afternoon and then fed it again by adding 1/2 cup warm water and 1/2 cup unbleached flour.  I did not dump any out first, because I like a little more starter in my jar - that way, when I take out 1 cup of starter for my recipes, I have a little more left in the jar to replenish.

      Day Four: My mixture was thick and had begun forming a little liquid on top, which I stirred in periodically.  It should be ready to use, so this evening I poured out 1 cup starter to make my Whole Wheat Sourdough Bread, which I should really start calling Whole Grain because I also add oatmeal, 7-grain cereal and wheat bran to - and I really need to update the recipe to reflect that.  I also replenished the starter with 3/4 cup warm water and 3/4 cup flour, and I will cover it and let it sit overnight.

      Day Five:  My replenished starter was nice and bubbly.  I let it sit most of the day and then put the lid on my peanut butter jar and put it in the refrigerator - ready to use next time I want bread.  Speaking of the bread - it's wonderful!  At this stage of the game, it takes longer to rise and doesn't rise as much as it will after the starter has been established, but it tastes so good.  And the best part?  No added yeast.

      Yep, I have fun with this!

      Enhanced by Zemanta

      Sunday, April 4, 2010

      Everyone's Favorite Pancakes


      Breakfast
      Breakfast (Photo credit: bcmom)

      These pancakes are one of our favorite Unleavened Bread recipes.  Every year we have them several times, and the kids say they don't ever want "regular" pancakes again.


      Golden Delight Pancakes
      • 1 cup cream style cottage cheese
      • 6 eggs
      • 1/4 teaspoon salt
      • 1/4 cup oil
      • 1/4 cup milk
      • 1/2 teaspoon vanilla extract
      • 1/2 cup flour
      Put all ingredients except flour into blender container.  Cover and blend at high speed, stopping to stir down once or twice.  Add flour and blend well.  Cook on greased griddle using about 1/4 cup batter for each pancake.  I use a ladle because it just seems to work better than pouring from the blender.  You should be able to cook 4 pancakes at a time on a regular square griddle.

      If you're not sure how to know when pancakes are done, read these instructions from  Baking 911:

      After pouring the pancake batter, the side towards the griddle is done when the bubbles on top of the opposite or batter side have burst and left small holes. The batter takes on a dry sheen as well. When this happens, it is time to flip the pancake. Before doing so, lift up a corner of it with a spatula to make sure it's nicely browned on the bottom. Using a wide spatula, lift the pancake off the griddle and flip it over, placing it back down on the griddle. When golden brown, remove pancake from griddle.

      Serve with butter, honey, syrup, strawberries, bananas, jam, or whatever you like with your pancakes.  Enjoy!

      Enhanced by Zemanta

        © Blogger template 'Totally Lost' by Ourblogtemplates.com 2008 - Header credit: Steve Wampler

      Back to TOP