bcmom's kitchen

bcmom's kitchen
Showing posts with label onions. Show all posts

Tuesday, December 20, 2016

Easy Vegetable Soup

I have plenty of recipes 'on deck' but for some reason I just haven't been getting around to posting any of them. I have some pictures, so hopefully I will remember what I actually did with these recipes - because, of course, I can never just follow a recipe. I just really need to sit down one of these days and get them all written up, if only for my own sake.


I've been fighting a cold this week, so the only thing that really sounded good was soup. I pulled some turkey broth out of the freezer, and I was just going to heat that up and drink it. But then I kept thinking of vegetables that would be good, so I just kept adding. Of course, feel free to add more or less or even omit a vegetable if you don't have it on hand. This is just what I did. This time.

Easy Vegetable Soup

Ingredients:
  • Olive oil
  • 1/2 a medium onion, chopped
  • 2 stalks celery, chopped
  • 1 carrot, chopped
  • 1 green bell pepper, chopped
  • 1/2 to 1 cup sliced cabbage
  • 2 garlic cloves, minced
  • 1/2 tsp. salt
  • 1/4 tsp. pepper
  • 1/4 tsp. turmeric
  • 2 cups turkey (or chicken) broth
  • 1 can (15 oz.) diced tomatoes
Directions:
  1. Heat olive oil in 2-quart saucepan. Chop onion, celery, carrot, bell pepper, and cabbage, adding them to the pan as you go. Cook, stirring frequently, until vegetables begin to soften; add garlic, salt, pepper, and turmeric, and cook for 1-2 minutes, until fragrant.
  2. Add broth and diced tomatoes. Bring to a boil; reduce heat, cover, and simmer for 15-20 minutes, until flavors are blended and vegetables are cooked. Season with additional salt and pepper if needed. Enjoy.

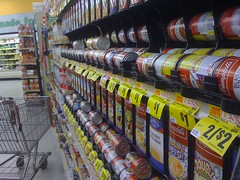
The Soup Aisle in PerspectiveOh, sure there are aisles full of canned soups in the grocery stores.  So many choices, and all you have to do is open the can and heat it up - but this isn't much harder than that, and it's much better because I know everything that went into it. It was exactly what I needed, and now that it's gone, I'm probably going to make another batch of it tomorrow.

Maybe I should add a jalapeno? That would certainly kick any last vestiges of this cold right outta there.

Friday, November 11, 2016

Easy Pepper Steak

The bell peppers in my garden did really well this year.  It's finally supposed to freeze tonight, so I pulled the rest of the peppers out of the garden this week.  So now I need to use peppers for everything!

So when I picked up some marked down steaks at the store - don't ask me what kind; I don't remember - I figured pepper steak would be just the thing.  Easy pepper steak is even better.


Easy Pepper Steak
adapted from Gimme Some Oven

Ingredients:
  • Marinade:
    * 1/4 cup soy sauce
    * 1/3 cup water
    * 2 T  white wine vinegar
    * 1 T corn starch
    * 1/4 tsp. black pepper
    * 1/4 tsp. ground ginger
  • 1 lb. thinly sliced steak, cut diagonally across the grain into thin strips
  • olive oil
  • 2 bell peppers, thinly sliced
  • 1 medium onion, sliced
  • 2 garlic cloves, minced
Directions:
  1. Mix all marinade ingredients in medium bowl. Add the sliced steak and toss to coat. Cover and refrigerate for at least 15 minutes.
  2. Heat large pan over medium high heat; add a little olive oil. Remove steak from the marinade with a slotted spoon (reserving the marinade) and saute about 2-3 minutes until browned, stirring occasionally.
  3. Add onions, peppers, and garlic; saute until onions start to soften (about 3 minutes), stirring occasionally.  Add reserved marinade and cook for a minute or two, until thickened.
  4. Serve immediately with rice.

This really is an easy recipe.  I changed it up a little and just cooked everything together.  Who has time for cooking the vegetables, removing them from the pan, and then cooking the meat - only to put everything back into the same pan in the end?  Not me!  OK, maybe it would make a difference, and maybe some day I'll try it just to see.  Maybe.


I will definitely be making this again.  Next time I think I'll add a few more veggies.  You can never have too many veggies!  I'd especially like to add a bit more color, but the peppers were what I had, and the peppers were all green.  Next time maybe some red.  And some carrots for the orange.  And... whatever veggies happen to be in the fridge.  Isn't that how it's supposed to work?


Monday, September 12, 2016

Onion Soup Mix

I like to use onion soup mix when I cook a roast, and I added it to my Slow Cooker Pepperoncini Beef for a bit of extra flavor.  When talking to a friend about that beef recipe, I mentioned that I had made my own onion soup mix, and she asked if I could share the recipe.  I had been meaning to post it so that I always have access to the recipe - I currently have it written on a piece of paper, but if the paper ever gets lost I might be in trouble.


So, it's time to share the recipe, for me and for any of my friends who might want to mix some up for themselves. 

Homemade Onion Soup Mix
from Heavenly Homemakers

Ingredients:
  • 2/3 cup dried, minced onion
  • 3 tsp. parsley flakes
  • 2 tsp. onion powder
  • 2 tsp. turmeric
  • 1 tsp. celery salt
  • 1tsp. sea salt
  • 1 tsp. sugar
  • 1/2 tsp. ground pepper
Directions:
  1. Measure all ingredients into a jar; cover and shake until well mixed.  (for best results, shake the jar before each use)
  2. 4 Tablespoons Onion Soup Mix = 1 packet of  store bought onion soup mix. (adjust amount of mix to your own tastes)
  3. Store in a dry, cool place.


That's it.  It's really simple and uses ingredients you probably already have in your spice cabinet.  I did have to buy the minced onion because I was out, but that's a handy ingredient to have on hand so it was time to get some of that anyway.  The original recipe listed turmeric as an optional ingredient, but I've started putting that in pretty much everything, even my morning coffee, so I consider it a necessary part of the recipe.

Sunday, April 3, 2016

Amazing Skillet Potatoes

It's time again for Secret Recipe Club reveal!  My secret blog assignment this month is Adventures in All Things Food.  Andrea lives on a large fruit and vegetable farm in Oregon with her husband and their three adorable kids,  She and the kids grow some beautiful produce in their backyard garden, and she loves good food without a lot of fuss.  Because, obviously she is extremely busy, but still wants to feed her family well. 

Quite a few of Andrea's recipes caught my eye.  Here are just a few:

When I saw these skillet potatoes, I knew I had to try them.   There is just something about the combination of mushrooms and spinach that I am a bit addicted to, and these just looked so good.  The only thing I changed about this recipe was to add an onion, because everything needs an onion!  But really, I think these potatoes would be wonderful with or without the onion.


Amazing Skillet Potatoes
adapted from Adventures in All Things Food

Ingredients:
  • olive oil
  • 4 russet potatoes, cubed (pre-cooked and chilled overnight)
  • 1 medium onion, chopped
  • 1 cup thinly sliced mushrooms
  • 2 cups fresh spinach
  • 2 T butter
  • salt & pepper to taste
  • 1/4 grated cheddar cheese
 Directions:
  1.  Heat cast iron skillet over medium-high heat.  Drizzle some olive oil into skillet and saute onions and mushrooms until tender and starting to brown.  Add spinach and allow to wilt.  Remove from skillet and set aside.
  2. Drizzle a little more olive oil in skillet and add cold cubed potatoes to skillet.  Allow potatoes to brown on the bottom and then add the butter.  When butter starts to melt, turn potatoes and allow them to crisp up on the other side.  Once they are nice and golden, stir the mushroom mixture back in.  Add salt and pepper to taste.
  3. Turn the heat off; sprinkle cheddar on top, and cover with a lid until the cheese melts.  Serve immediately.

I've often relied on fried potatoes as an easy dinner when I don't know what else to fix.  Heat some oil in a pan and toss in some potatoes, onions, and sometimes peppers, and you've got a yummy and satisfying meal.  These particular potatoes don't quite work that way.  Oh, they're definitely yummy and satisfying, and they are awesome for dinner.  But they do take a little planning ahead because the potatoes need to be cooked ahead and refrigerated, so when they go into the skillet all they really need to do is warm and brown instead of cook completely.  That extra step is most definitely worth it.  The flavor is wonderful.

And when I added the butter to the skillet?  Over the top, heavenly smells in my kitchen!  These potatoes were just wonderful.  Even after I was stuffed from eating so much, I just could not stop picking individual pieces of potato out of the skillet and eating them.  So good.  And then the leftovers?  Just as good.  I heated them up and then scrambled some eggs with them, and added some additional cheese to the top.  They were perfect!

I will definitely be making these again.


Friday, January 22, 2016

Lentil Garlic Soup

I thought for sure I had posted this recipe already, but when I started looking for it so I could make this soup, I realized it wasn't here.  Thankfully I printed the recipe in 2001, so I was still able to make soup.  Yes, I've been making this soup for a few years now.


Lentil Garlic Soup

Ingredients:
  • 1 to 2 T olive oil
  • 2 medium onions, chopped
  • 4 cloves garlic, chopped
  • 1 tsp. salt
  • 1 tsp. cumin
  • 4 to 6 cups chicken broth
  • 2 to 4 cups water, to bring total liquid to 8 cups
  • 16 oz. bag lentils, rinsed
  • 1 (15 oz.) can diced tomatoes
  • lemon wedges
Directions:
  1. Heat oil in 5-quart pan.  Add onions and garlic; cook until onions are soft, stirring frequently.  Add salt and cumin and cook until fragrant.
  2. Add broth, water, and lentils; bring to a boil.  Reduce heat and simmer, covered, for 45 minutes.  Add tomatoes and simmer for 10 to 15 minutes more.
  3. Serve with lemon wedges and crackers.

I really like this soup.  It's simple and tasty.  I especially like it after it's been cooled and then reheated.  It gets thicker and better each time.

Definitely do not forget the lemon wedges.  They add the perfect finishing touch to the soup.  Just squeeze the juice over your soup and drop the wedge in.  So good!


Tuesday, January 12, 2016

Tuscan Chicken Soup

When I saw the recipe for Tuscan Chicken Stew on South Your Mouth, I knew I had to try it.  It just looked so good.   Of course, I didn't quite follow the original recipe, but I did use basically the same ingredients, and I kept all the seasonings the same.  I think it turned out great.


This soup is sure to become a favorite around here. I will definitely be making it again. It's super flavorful and easy to make.

Tuscan Chicken Soup
adapted from South Your Mouth

 Ingredients:
  • 1-2 T olive oil
  • 1 lb. boneless skinless chicken thighs, cut into bite-sized pieces
  • 1 large onion, diced
  • 3 cloves garlic, minced
  • 4 stalks celery, diced
  • 1 tsp. salt
  • 1 tsp. black pepper
  • 1 tsp. dried thyme
  • 1/2 tsp. paprika
  • 1/2 tsp. Italian seasoning
  • 1/4 to 1/2 tsp. red pepper flakes
  • 3 carrots, diced
  • 5 medium potatoes, diced
  • 1 15-oz. can great northern beans, drained and rinsed
  • 1 15-oz. can diced tomatoes
  • 4 cups chicken broth
  • 2 cups water
  • 1 bay leaf
Directions:
  1. Heat oil in large Dutch oven (6 quart); add chicken and cook for 2-3 minutes.  Add onion, garlic, and celery; cook until chicken is no longer pink and vegetables are soft, stirring frequently.  Add seasonings and cook for a few minutes until fragrant.  Stir in carrots, potatoes, beans, and tomatoes and then add broth, water and bay leaf.
  2. Bring to a boil; reduce heat and simmer for 45 minutes with lid slightly cracked, stirring occasionally.  Add additional salt and pepper to taste.  Cook a few minutes longer if needed, until carrots and potatoes are done.

I made this soup one day and then reheated it the next.  I think all soups get better when you reheat them, and some absolutely have to be made a day before you want to eat it.  I think this one would be good either way.   I made fresh cornbread to go with the soup, which was really good.  It would also be good with some nice crusty bread.

I used the1/2 tsp. red pepper flakes, and the soup had a nice kick to it.  My husband, who does not like his food very spicy at all, didn't complain and really liked the soup, but if you don't like a lot of spice you'll probably want to cut the measurement down to 1/4 tsp. - at least the first time.

Wednesday, November 25, 2015

Roasted Veggies and Sausage

A few weeks ago I was checking out at the grocery store. I was buying smoked sausage, red potatoes, and cabbage. There were a few other things too, but there was something about seeing those things on the belt that made me think I really needed to throw something together with them.  I went looking for inspiration, and this recipe from real life Dinner was pretty much exactly what I had in mind.  Except I changed the vegetables a bit.  That, of course, is the beauty of a recipe like this - you can use the vegetables you have on hand or the vegetables that are telling you they really want to be thrown together into something yummy.  I think any number of combinations would work.


Roasted Veggies and Sausage
adapted from real life Dinner

Ingredients:
  • 1 large onion, cut into chunks
  • 3-4 cloves garlic, chopped
  • 3-4 large carrots, sliced
  • 4-5 medium red potatoes, diced
  • Coarsely sliced cabbage (I did not measure)
  • 3-4 T olive oil
  • Salt and pepper to taste (I used 1 tsp. salt and freshly ground pepper)
  • 1 12-16 ounce package smoke sausage or kielbasa, sliced into 1-inch pieces
Directions:
  1. Preheat oven to 425° F.
  2. Toss veggies with olive oil and salt & pepper in 13x9" pan.  Top with sliced sausage.
  3. Bake for about an hour, stirring every 20 minutes or so.

That's it.  Really simple and really tasty.  Just chop your veggies up, toss them together, bake, and enjoy!


The secret is to cut all the veggies into similar sized pieces so they will cook evenly.  Next time I think I am going to cut my carrots and potatoes just a bit smaller.  Also, the size of your veggies, and how well roasted you like them, will determine how long you'll need to bake this.


This heats up really well, and the leftovers might be even better than the first time.  we had some green beans with it the first night, and I just threw them into the pan and roasted them with the rest.  (see them in the back there?)  Just really so good.

Thursday, October 22, 2015

Chard and White Bean Stew

I'm still getting a few things from my garden.  The tomatoes are ripening, and I've been picking a few every couple days.  There are plenty of green ones still needing to ripen.  There are also quite a few small jalapenos on the plants and some bell peppers, too.  We had to cover the tomato and pepper plants for a few nights this weekend to protect them from frost, but it's warmed up again so we should be good for a while.  I've also got carrots and chard still out in the garden.  I read somewhere that carrots will taste better after a couple of good freezes, so though I've pulled several of the carrots, I'm going to leave the rest of them for a while.  Chard can survive a frost, so I should be having that for a while, too.


With all the chard and tomatoes, I started searching for a recipe that would use some of them.  There are quite a few good sounding recipes, but this one won out.  She served this with crusty bread, and a poached egg on top, but I skipped the poached egg.  It does look interesting, though.  Perhaps next time?

Chard and White Bean Stew
Adapted from Smitten Kitchen

Ingredients:
  • 1 cup chopped carrots
  • 1 cup chopped celery
  • 1 cup chopped onion
  • 2 garlic cloves, finely chopped
  • 1 pound Swiss chard (or another green), stems removed and coarsely chopped
  • 3 tablespoons olive oil
  • 1 cup dry white wine (or juice of half a lemon and water to make 1 cup)
  • 2 15-ounce cans (or about 4 cups) white beans, drained and rinsed
  • 1 cup chicken broth (or 2 cups broth and not bean liquid)
  • 1 cup bean liquid (if using home cooked beans)
  • 1-2 cups pureed tomatoes
  • 1/2 tsp. salt
  • 1/4 tsp. black pepper
  • 1/4 tsp. dried thyme
  • 1 bay leaf
Directions:
  1. Prepare vegetables.  Heat olive oil in 5 to 6 quart pot over medium heat. Add carrots, celery, onion and garlic and saute for 15 minutes or until onion begins to brown. Add chard and cook, stirring, until chard begins to wilt. 
  2. Add wine (or lemon water), scraping up any bits that have stuck to the pot and cook until it has reduced by three-fourths. Add beans, broth, tomatoes, salt, black pepper, thyme and bay leaf and bring to a boil. Reduce heat to medium-low, cover and simmer for 20 minutes. 
  3. Add more broth if you’d like a thinner stew and adjust salt and pepper to taste.  Serve with crusty bread.  Drizzle with Balsamic vinegar if desired.

I really enjoyed the flavors in this. My husband didn't drizzle any of the vinegar on his, but I thought that really added a nice touch.  I really love when the broth soaks into the bread.  So good!


This whole grain sourdough is the perfect complement to so many things!  I used 1 cup of the bean liquid in this batch, instead of the water.

Saturday, September 19, 2015

Sweet Chili Chicken Pizza

I've made this pizza several times now.  It's really good and simple to make.  I've never had Papa Murphy's Thai Chicken Delite pizza, so I can't say for sure it's the same.  But it was the inspiration.


Sweet Chili Chicken Pizza

Ingredients:
  • pizza dough 
  • sweet chili sauce
  • grilled chicken
  • chopped onions
  • sliced green onions
  • thinly sliced zucchini
  • Mozzarella cheese
  • Cheddar cheese 
Directions:
  1. Roll/press pizza dough out to form crust for one pizza; prick with fork and bake at 450° for 5-7 minutes..
  2. Remove crust from oven.  Spread sauce over crust and top with toppings.  Sprinkle with crushed red chili flakes if desired.
  3. Bake for an additional 10-15 minutes or until crust is browned and cheese melted.
  4. Remove from oven and cool for 5 minutes before cutting.  Top with sliced fresh basil if desired.

I have no measurements because it's pizza, and you just put toppings on until it looks right to you. There's no right or wrong way.  I do think it's better if you slice the zucchini really thin, but it's OK if you don't too.  I seasoned my chicken with a little salt, pepper, and ground ginger when I grilled it (in my George Foreman), which was pretty good on this pizza, too.


Now I just need to make some more of that sweet chili sauce.

Saturday, June 20, 2015

The Secret to a Crispy Cauliflower Crust Pizza

I recently tried making pizza with a cauliflower crust.  The flavor was really good, but the crust turned out a bit soggy.  Not a huge deal - we just ate it with a fork.  But, I wanted to see if I could get it a bit crisper and make a cauliflower crust that could actually be picked up.


Yes, it is possible.  Here are three things that I think made all the difference:
  1. Be sure to remove as much moisture from the cauliflower as possible.
    Steaming the cauliflower works better than boiling it, because there isn't as much water in the cauliflower to begin with.  Whichever way you cook it, be sure to drain it thoroughly and then use a cotton towel or several paper towels and squeeze as much liquid out of the cooked cauliflower as you can get.
  2. Use a pizza stone.
    The bottom crisps up better, and the crust seems to cook faster.  On the baking sheet, I think we should have cooked it longer than 15 minutes to brown better before we added the toppings.  On the pizza stone, it only needed about 12 minutes.  You will need to pat the crust out onto parchment paper so you can slide it onto the hot pizza stone in the oven, and so you can easily slide it out when it's time to add the toppings and remove the cooked pizza.
  3. Cool on a wire rack.
    This might be the most important one.  When you slide the pizza out of the oven and off the pizza stone, it will be nicely browned and crisp.  However, if you leave your pizza on a cutting board to cool slightly before cutting, it will begin to steam and get soggy in the middle.  I noticed mine was doing this and actually slid it back onto my hot pizza stone to crisp back up, then I put it onto a wire rack to cool, still on the parchment.  All that moisture then went down through the rack and onto the counter underneath, and my pizza was not sitting in it.
The result?  Nice crispy crust that we could pick up!


I was just going to have you visit my first cauliflower crust pizza post to get the recipe, but it will be easier just to have it here.  I updated it to reflect the changes.

Cauliflower Crust Pizza
adapted from Dancing Veggies

Ingredients:
  • 2 cups cauliflower florets, steamed, drained, and mashed
  • 1/2 cup mozzarella cheese, shredded
  • 1/4 cup Parmesan cheese, shredded
  • 1 egg, beaten
  • 3 cloves garlic, crushed
  • 1-1/2 tsp. oregano
Directions:
  1. Preheat oven to 450° F
  2. In a medium bowl, mix the mashed cauliflower, egg, and cheeses. Add the garlic and oregano and stir well. Pat out on parchment paper to desired size and thickness.  Transfer to pizza stone and bake for 10-15 minutes, until golden.
  3. Remove the crust from the oven and top with your favorite toppings and cheese.  We used a simple homemade pizza sauce, grilled chicken, onion, red pepper, feta, spinach, and mozzarella. 
  4. Brush or spray the edges of the crust with olive oil and then bake for an additional 15 minutes, until the cheese and crust are nicely browned.
  5. Remove from oven and cool on a wire rack for 5 minutes.  Cut and enjoy!

Sunday, May 31, 2015

Pizza with a Caulilflower Crust


It's time again for Secret Recipe Club reveal!  My secret blog assignment this month was Dancing Veggies, a blog with a focus on healthy, simple, and quick vegetarian dishes on a budget.  Amanda started cooking in high school when her mother declined to fix special meals for her.  If she wanted to eat differently from the rest of the family, Amanda would need to cook her own food.  Smart mom!   

While we don't eat a vegetarian diet - my husband would complain loudly if he didn't get his meat! - I think adding more veggies to our diet will always be a good thing.  Amanda's blog is a wonderful resource full of interesting and tasty vegetarian recipes I will definitely be trying out in the future.   A couple that caught my eye were the Avocado Tomato Grilled Cheese and these Twice Baked Potatoes – Samosa Style.  We did make a version of the grilled cheese, which was super yummy, but when my son mentioned that he'd been wanting to try a cauliflower pizza crust, I decided to check to see if Amanda had one on her blog.  Yes, she did, so we worked together and made an amazing pizza with a cauliflower crust.  We did add chicken to our pizza, so it wasn't vegetarian, but I think it would have been just as good without it.


Cauliflower Crust Pizza
adapted from Dancing Veggies

Ingredients:
  • 2 cups cauliflower florets, steamed and mashed
  • 1/2 cup mozzarella cheese, shredded
  • 1/4 cup Parmesan cheese, shredded
  • 1 egg, beaten
  • 3 cloves garlic, crushed
  • 1-1/2 tsp. oregano
Directions:
  1. Preheat oven to 450° F
  2. In a medium bowl, mix the mashed cauliflower, egg, and cheeses. Add the garlic and oregano and stir well. Pat into the bottom of a pizza pan or cookie sheet; bake for 10-15 minutes.
  3. Remove the crust from the oven and top with your favorite toppings and cheese.  We used a simple homemade pizza sauce, grilled chicken, onion, red pepper, feta, spinach, and mozzarella. 
  4. Brush the edges of the crust with olive oil and then bake for an additional 15 minutes (or longer), until the cheese and crust are nicely browned.

The flavor of this crust is absolutely amazing!  All that garlic!  Great call, Amanda.


 It's so good my son said he was going to marry this pizza.  We are already thinking of ways to improve it, though.  We were in a hurry, so we didn't remove enough of the moisture from the cauliflower after steaming it.  Some recipes mention squeezing it out in a dish towel.  I don't know that we'll go to that extreme, but the crust did have a little more moisture than we liked, so we'll take that extra step of draining it thoroughly, at least, next time.  Also, we cooked it on a cookie sheet with parchment paper - instead of on the pizza stone that I have right there in my oven.  So, I will be using the pizza stone next time, and maybe cooking the crust a bit longer before adding the toppings.  We're hoping those little tweaks will get the crust just a bit crisper on the bottom.
 

This is definitely a recipe I will be using again.  I'm so glad my son was wanting to try it and willing to help me.

Update:  I tweaked it a bit and we had cauliflower crust pizza you can pick up and eat!


Sunday, February 1, 2015

Chicken Quesadillas


It's time again for Secret Recipe Club reveal!  My secret blog assignment this month was Sid's Sea Palm Cooking.  Sid lives in a small town 30 miles from the nearest Mexican or Chinese restaurant - or probably any other good restaurant, so she makes her own food at home.  I bet it tastes better anyway!  And Sid is really good at making the recipes simple and easy-to-follow so anyone can do it.

I kinda got stuck in the Mexican food section while trying to narrow down my choices. Southwest Casserole and Acapulco Chicken were two that caught my eye, but I finally decided on these yummy quesadillas.  I'm always on the lookout for easy but flavorful dinner ideas, and these fit the bill exactly.   Serve these with a nice salad, and you have a quick and delicious dinner.


Chicken Quesadillas
adapted from Sid's Sea Palm Cooking

Ingredients:
  • 1/2 a medium onion, diced
  • 1/2 a bell pepper, diced
  • 1/2 a cooked chicken breast, diced
  • 1 to 2 T chopped cilantro
  • minced jalapeno (optional)
  • 2 flour tortillas (8 or 10 inch)
  • Shredded cheese
Directions:
  1. Heat a little olive oil in a medium skillet over medium heat.  Add diced onion and peppers and saute until onion starts to soften.  Add diced chicken and cilantro and heat through.  Set aside.
  2. Place 1 tortilla in a larger skillet over medium low heat.  Add a layer of cheese and then half of the chicken and vegetable mixture, covering the entire tortilla.  Heat until the cheese starts to melt and then fold tortilla in half.  Add the other tortilla to the skillet; half of it will be resting on the first one.   To the half sitting on the bottom of the skillet, add a layer of cheese, the rest of the chicken and vegetable mix, and then another layer of cheese.  Fold over.
  3. Heat until cheese is melted and tortillas are starting to brown.  Flip over and  brown the other side.
  4. Once they're browned to your liking and all melty, remove quesadillas from the skillet and cut into wedges.  Serve with salsa and sour cream if desired.
Makes 2

Sid added the minced jalapeno to her quesadillas, but I chose to leave it out - even though I would have loved a little heat, too - because I didn't want these to be too spicy for my husband.  I seasoned the chicken breast with adobo seasoning when I cooked it and added some chopped cilantro to the chicken and vegetable mixture for a bit of extra flavor without getting too spicy.


Heat or no, the flavors were really good.  I had mine with a bit of salsa and sour cream, and extra cilantro and some avocado, but he ate his just the way they were.  We'll be having these again.


Soon - since I used half an onion and half a pepper, I only used half the chicken breast I cooked, so that means I got to make them again!  They make a really good lunch, too.  I added the jalapeno to those - because my husband wasn't home - and a squeeze of lime.  So good!


Friday, March 28, 2014

A Couple of Pizzas

I made a couple pizzas for dinner this week.  They both turned out pretty good!


 And we have a whole pizza - some pieces from each - left over for another meal!  Here are the toppings for both pizzas.  No measurements really, because pizza is just like that.  You pile on the toppings until it looks right to you.

Barbecue Chicken Pizza
  • Barbecue sauce
  • 1 boneless chicken thigh, grilled
  • Sliced onion
  • Sliced mushrooms
  • Cheese - Mozzarella and Cheddar
Roast Beef Pizza
  • Garlic Ranch Sauce - Ranch dressing mixed with minced garlic
  • Parmesan cheese
  • Leftover roast beef, cut into bite-sized pieces
  • Sliced onion
  • Sliced mushrooms
  • Asparagus pieces
  • Cheese - Mozzarella and Cheddar, crumbled Queso Fresco
  1. Spread sauce on crust, sprinkle Parmesan on the Garlic Ranch sauce.  Add toppings and cheese. 
  2. Bake pizzas at 450° F for 15 minutes or until crust is done and cheese is melted and browned.  
  3. Remove from oven and let sit for at least 5 minutes before cutting.

I am still trying to find the perfect Pizza crust recipe or technique or whatever the secret is to that perfect crust.  This one wasn't too bad, but there's definitely room for improvement.  The toppings, on the other hand, were very yummy!

Sunday, February 23, 2014

Easy Fettuccine Cacciatore

This recipe was on the same page of the Kraft Food & Family magazine with the Beef Noodle Bowl, which I now make quite regularly.  And this week I finally got around to trying this one.  I had mushrooms that needed used and a green pepper in the fridge, too, so it was the perfect time.

This is a very simple recipe and very tasty.


Easy Fettuccine Cacciatore
adapted from Kraft Recipes

Ingredients:
  • 8 oz. fettuccine
  • 2 tsp. oil
  • 1 lb. boneless skinless chicken breasts, cut into bite-size pieces
  • 1 green pepper, sliced
  • 1 medium onion, sliced
  • 1 cup sliced fresh mushrooms
  • 1 T dried basil
  • 1 can (14-1/2 oz.) diced tomatoes, undrained
  • 1/4 cup Italian Dressing
Directions:
  1. Cook fettuccine as directed on package.
  2. While fettuccine is cooking, heat oil in large skillet on medium-high heat. Add chicken; cook and stir 5 to 6 min. or until no longer pink. Add sliced peppers, onions, and mushrooms; cook 3 min., stirring occasionally. Add basil and cook for a minute or two, until fragrant.  Stir in tomatoes and dressing; simmer on medium-low heat 5 minutes or until chicken is done.
  3. When pasta is cooked, add some of the pasta water to the chicken and vegetable mix.  Drain pasta and toss with chicken mixture; simmer a couple minutes to blend flavors.

I added the sliced onion, because the original recipe didn't call for any onion - and it just needed some onion.  (doesn't everything?)

Sprinkle with a little Parmesan cheese, serve with a vegetable and some crusty bread, and you have a very delicious meal.   I think I'll be making this one on a regular basis, too.

Wednesday, January 22, 2014

Spicy Avocado Chicken

My friend Ricki shared this recipe on Facebook about 5 years ago.  I tried it once before and really liked it, and then didn't make it again until tonight.  Why did I wait so long?  This stuff is so good!  It's like that other famous recipe I got from Ricki - Spicy Slaw.  Absolutely yummy!


Spicy Avocado Chicken
adapted from Ricki's recipe

Ingredients:
  • 1 lb. boneless skinless chicken breasts
  • 2 large ripe avocados
  • 1 to 1-1/2 cups chopped onion
  • 3 cloves garlic, chopped
  • 1/2 cup fresh cilantro, chopped
  • 1/2 cup medium/hot Salsa (Pace Picante or equivalent favorite)
  • 1 cup water
  • 1 Tbsp butter
  • 2 tsp garlic salt
  • 1 tsp. seasoned salt
  • 1/4 tsp. black pepper
  • Salt (to taste)
Directions:
  1.  Thoroughly mash the avocados into a paste, chop all vegetables, cut chicken into strips, cubes, or desired size, and measure out salsa.
  2.  Put water and butter into a large skillet and set on Medium heat.  When butter starts to melt, add the vegetables, chicken, avocado, salsa and seasonings to the skillet, and cover.
  3. Stir after 5 minutes. Continue to cook, stirring occasionally, until chicken is cooked through and sauce is thick, 25 to 30 minutes. Add more water, if needed, for desired sauce consistency.
  4. Add salt to taste, and serve.
Serves 4

Ricki's recipe called for chopped mushrooms and onion powder, but I didn't have any mushrooms, and my onion powder is hard as a rock.  So I just used more onion than in his recipe and added some chopped garlic.  I did not add any additional salt at the end because it did not need it, and we ate it with tortilla chips which have salt of their own.

Ingredients added to the skillet
Even though the word 'Spicy' is in the name of this recipe, it really isn't spicy - just flavorful.  My husband doesn't like hot foods, but he really like this.

add the mashed avocados and seasonings

Thanks for sharing, Ricki!  This is a really easy and flavorful recipe, and I really must make it more often.

Sunday, May 5, 2013

Tex-Mex Stuffed Sweet Potatoes

It's time again for  Secret Recipe Club (Secret Recipe Club) reveal!  This month I got to choose a recipe from Beth's blog It's Good To Be The Cook.  Beth lives outside Philadelphia, loves her family, her wonderful (and cute) boyfriend Dave, and her dog Stella.  Her posts are so much fun to read.  They're not just about the food - though the food is definitely front and center with recipes and loads of mouth-watering pictures.

So I started looking at the recipes - Oh, Beth!  So many great recipes.  How am I supposed to choose?  I love all the spicy stuff and that there's spinach in practically everything.  OK, maybe not everything, but a lot.  It looks like she's almost as obsessed with fresh spinach as I am.  I love it in practically everything!  Also, she has all her clipped and saved recipes organized in a binder - something I've thought about/wanted to do for ages, and never got around to it.  Yep, I still have boxes of magazine and newspaper clippings, recipes I wanted to try but may never find again.  I'm kinda jealous of her organizational skills.

Anyway, I started looking through the recipes, and I wanted to try the Buffalo Chicken Soup, the Black & White Bean Quesadillas w/ Avocado Ranch Dip, the Buffalo Chicken Stuffed Baked Potato, the Chicken and Bean Burritos, and several more, but I finally decided on these Tex-Mex Stuffed Sweet Potatoes. And it was a very good decision.  These things are yummy!!!


Tex-Mex Stuffed Sweet Potatoes
slightly adapted from It's Good to Be the Cook

Ingredients:
  • 2 Sweet Potatoes
  • 2 T Olive Oil
  • 1/2 Onion, chopped
  • 1 T Garlic, minced
  • 1 Jalapeno, chopped (seeded for less heat)
    just some Spinach
  • 4 or 5 mushrooms, sliced
  • 1 cup frozen Corn, thawed
  • 1 T Cumin
  • 1 T Chili Powder
  • a bunch of fresh Spinach (sorry, I didn't measure)
  • Salt & Pepper to taste
  • 1 can Black Beans, drained and rinsed (1-1/2 cups home-cooked)
  • 1 T Cream Cheese
  • 1/2 cup Plain Yogurt
  • 1 cup (or less) Cheddar or Mexican Blend Shredded Cheese
  • Parsley Flakes & Paprika for garnish
Directions:
  1. Preheat oven to 350°.  Wash potatoes and pierce a few holes or slices in the top. Pat dry and place on foil or a baking sheet in the oven for 1 hour and 20 minutes, checking at the 1 hour mark. They will be cooked when they can be easily pierced with a fork.  Set aside while you prepare the filling.
  2. Heat the oil in a large skillet on medium high. Add the onions and saute for 3 minutes then add the garlic, jalapeno and mushrooms and saute another 3 minutes or so. Now, add the corn and saute for another 3 minutes and then stir in the seasonings. Let that saute for a bout a minute and then add the spinach and saute until it’s just cooked and wilted. Season with the salt and pepper. Turn heat to low.
  3. Add cream cheese to skillet and stir until it is melted.  Stir in the yogurt and beans.
  4. Slice the potatoes in half lengthwise, scoop out most of the potato with a spoon, and add it to the skillet.  Stir to combine, and taste and add seasoning if necessary.
  5. Evenly spoon the filling back into the sweet potato boats and top with shredded cheese.
  6. Turn the oven to broil and slide the potatoes back in until the cheese is just lightly browned and bubbly, about 3 minutes.
  7. Garnish with a shake of Paprika and Parsley and serve immediately!

I didn't actually pay attention to how long I sauteed the onions, garlic, peppers, etc.  Just added the onion to the skillet, cooked it a bit, then started adding all the other ingredients.  It's basically what looks good to you.  It does look good, doesn't it?  Oh, and I only used 1/2 of the jalapeno because I thought the whole thing would make it too spicy for my husband, but it didn't turn out spicy at all, so I'd suggest sticking with the whole thing.  Or using the pickled ones like Beth did in hers.
Onions, garlic, jalapeno, mushrooms and corn
And then I added the cream cheese - the heat from the skillet melted it very nicely - and the yogurt and beans.  Doesn't this look yummy?  For some reason, I didn't taste it, but it certainly smelled amazing.  I'm thinking this mixture right here would be perfect for something.  I'm not sure what yet - over pasta?  With some pasta mixed in?  Spread over tortilla chips, topped with shredded cheese and baked like nachos?  Yeah, there's something...  I should've tasted it, though, because I forgot to add the salt and pepper like I was supposed to.
Creamy!
My potatoes were so done that I had to be careful not to scoop all of the flesh out of them, leaving nothing but the peel behind.
Sweet potatoes scooped out
I put as much filling as I could into the scooped out potato skins, and I had some left over, so I saved that for later.  It was great warmed up and wrapped in a tortilla and also just scooped up with tortilla chips.  This is good filling!  I added some salt right before I sprinkled the cheese on - because I forgot to taste and add it earlier. 
Ready to go under the broiler
The filling is already hot, so it doesn't take long to melt the cheese under the broiler, and they're ready to eat.
Ready to eat!
These things are really filling.  We had one potato half with some salad, and that was enough!  That means we got to enjoy them for another meal.  I just put them into a Corningware dish and baked them, with the lid on, for 20 to 30 minutes at 350°.  Perfect!  My husband just ate the filling both times and threw the potato skin away.  I ate the skin, and I liked it much better after it was baked.  It kind of crisped up a bit.  I'm thinking that next time I make these I'm going to bake them until the cheese is melted and browned, instead of broiling.  Either that or scoop absolutely all of the potato out of the skins, mix the filling, and put it into some kind of baking dish to broil and melt the cheese.

So many yummy flavors.  I am definitely making these again!  And trying some of those other recipes from Beth's blog.  Be sure to check it out for yourself.


Sunday, March 24, 2013

Homemade Salsa

I have a couple other recipes for homemade salsa, but decided I better save this one too when I saw it on facebook today.  It looks really easy and good.


Homemade Salsa

Chop 5-6 Roma tomatoes,1 small onion and 1/2 cup fresh Cilantro. Mince 2 seeded Serrano or Jalapeño peppers and 1 clove of garlic. Add 2 tbsp. freshly squeezed lime juice and salt and pepper to taste. Mix everything together and let sit overnight for flavors to meld.

Enhanced by Zemanta

  © Blogger template 'Totally Lost' by Ourblogtemplates.com 2008 - Header credit: Steve Wampler

Back to TOP